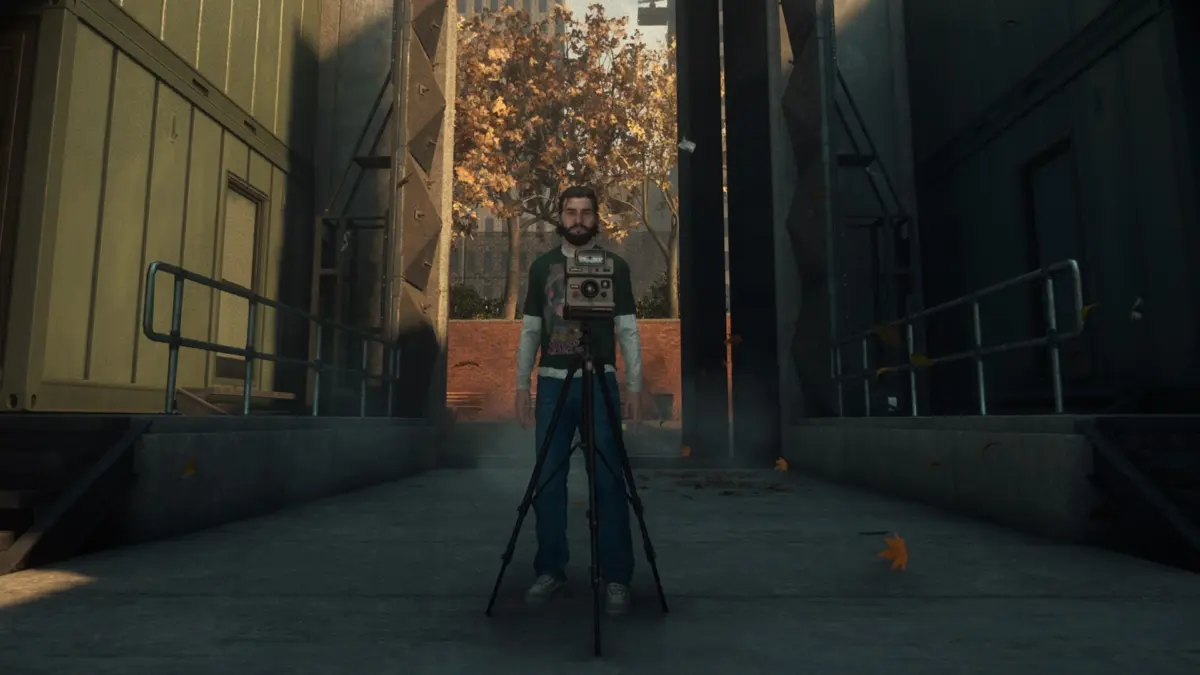
In the sprawling, reality-bending architecture of Remedy Entertainment’s Control Resonant, players often find themselves pitted against inanimate objects corrupted by extra-dimensional forces. Among the most vexing and hazardous threats introduced in the latest expansion is the "Freeze Frame" questline, an investigative and tactical trial centering on a series of autonomous, hostile cameras scattered across every major zone of the map.
These aren’t ordinary surveillance devices. Engineered or warped by unknown resonance, these cameras possess the anomalous capability to instantly paralyze anyone caught within their lenses, freezing both players and civilian NPCs mid-motion. To neutralize the threat, Bureau operatives must rely on advanced traversal mechanics—specifically the Shift, Reach, and Crush abilities—to outmaneuver the lenses, approach the hardware from behind, and manually shut down their physical lids.
Beyond simply locating the hardware, completing the "Freeze Frame" quest requires mastering complex spatial puzzles involving power-core circuits, mold-choked corridors, and inverted gravity pathways. This comprehensive guide provides an authoritative, beat-by-beat chronology for locating every single camera across the game’s disparate sectors, followed by an exhaustive tactical breakdown of the final containment puzzle outside the Oldest House. Successfully navigating this crisis yields not only regional safety but also the coveted Shiny Pebble artifact recipe, a game-changing gear addition that automatically regenerates player health up to 50% while operating within gravity anomalies.
Detailed Chronology: Zone-by-Zone Camera Locations
To efficiently dismantle the camera network, operatives are provided with instant-photo hints, though these visual clues offer only a fraction of the necessary context. Furthermore, Bureau experts strongly recommend securing the Shift and Reach traversal abilities before embarking on this statewide hunt.
Below is the definitive chronological mapping of every "Freeze Frame" camera location, categorized by region.
1. Downtown "Freeze Frame" Cameras
Downtown presents two distinct camera nodes, each requiring specific clearance and traversal upgrades.
Gravity Town Camera (Northwestern Downtown)
Prerequisite: You must acquire the Shift ability from the Incursion Fault located within the West Incursion Zone.
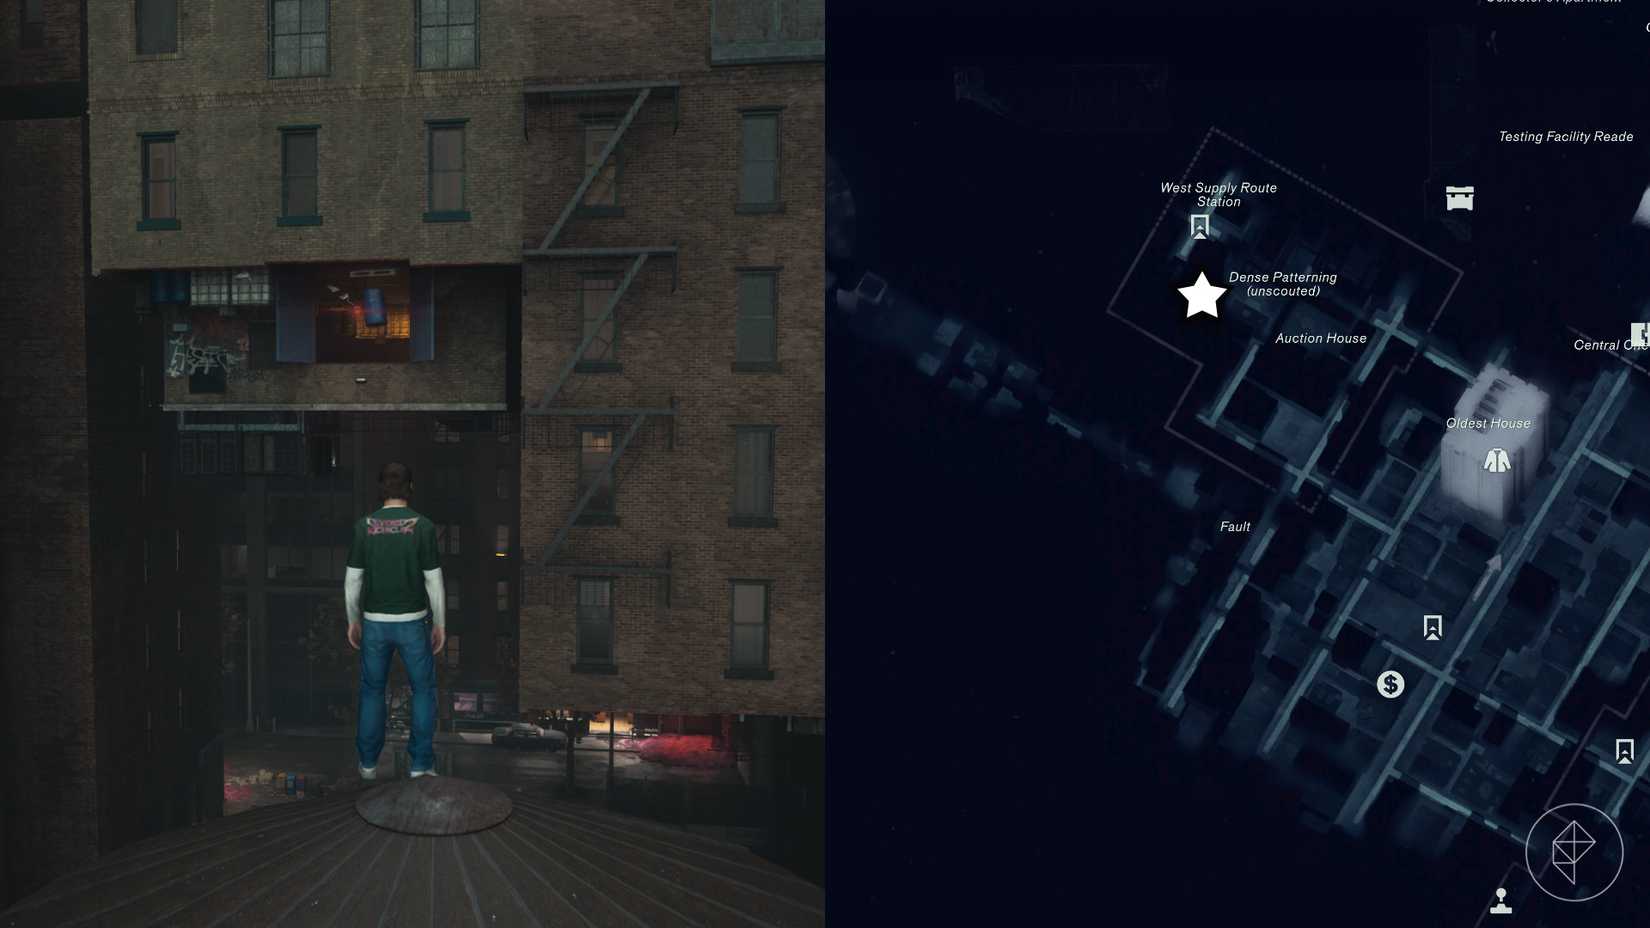
Location: Positioned in the northwestern sector of Downtown, directly east of the Dense Patterning area and south of the West Supply Route Station.
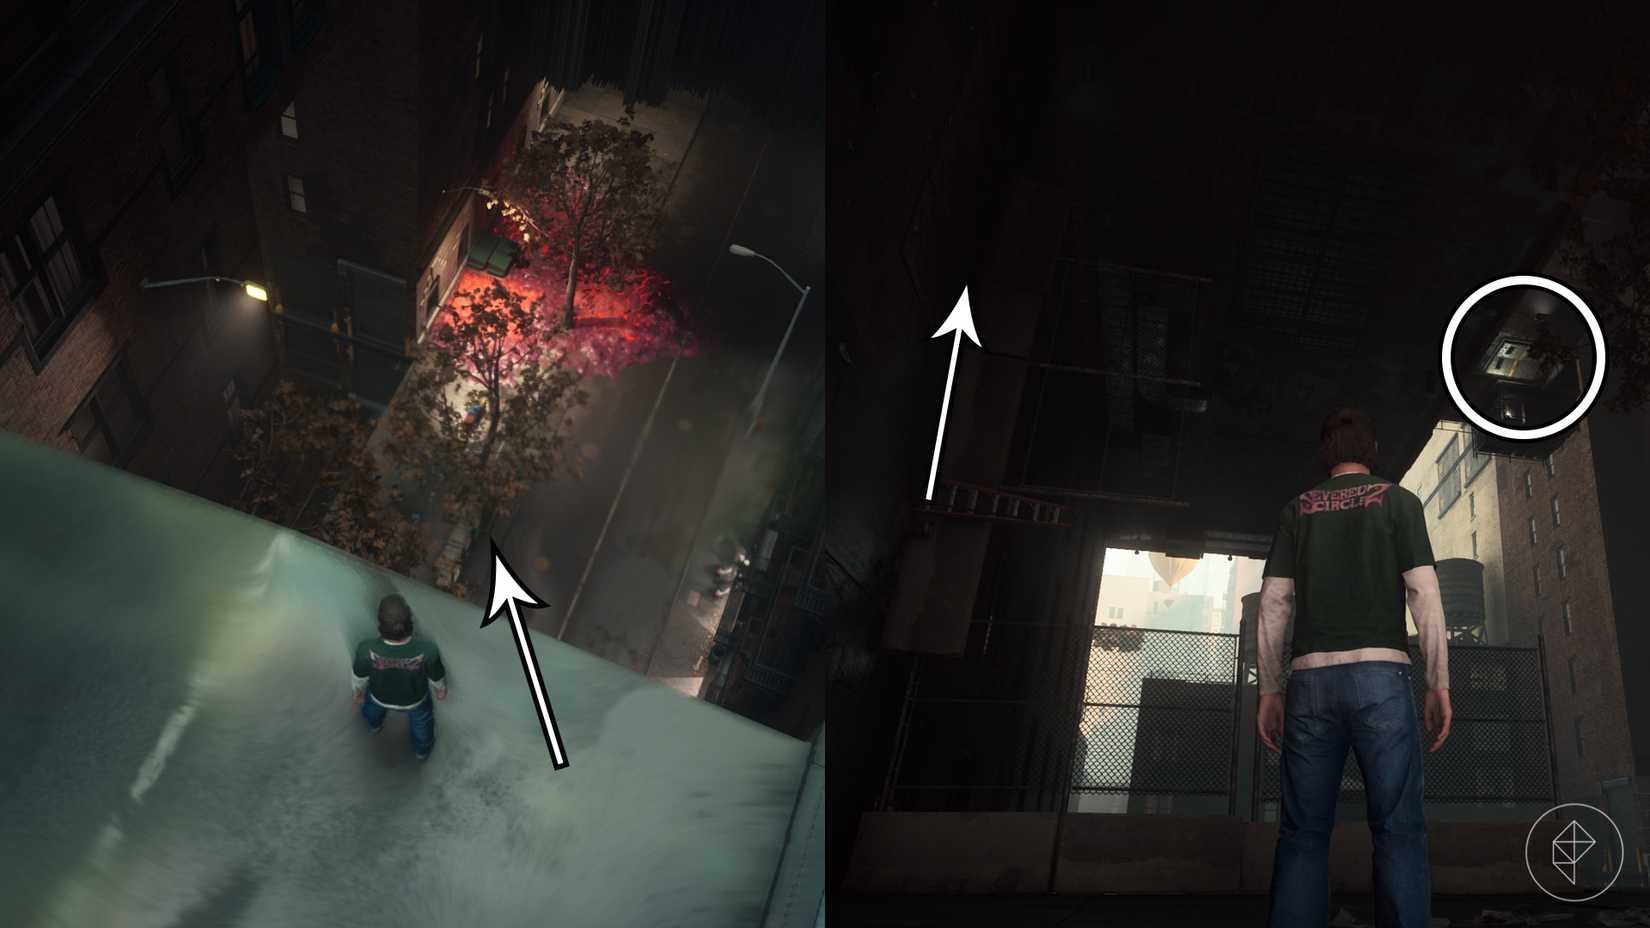
Execution: Follow the road southwest from the West Supply Route Station until you drop onto a lower street tier. Look to your east to spot an inverted, upside-down building featuring a locked metal door. Use Shift to scale the vertical wall on your left, dropping directly onto the rooftop housing the door. Wield your Crush ability to smash the reinforced door open, step inside, and manually shut the camera’s lid.
East Downtown Camera (Southeastern Region)
Prerequisite: Requires the Reach ability, harvested from the Subway Fault in the Evacuation Zone. Securing the "Extended Rush" talent is also heavily advised to nail the precise timing required for this route.
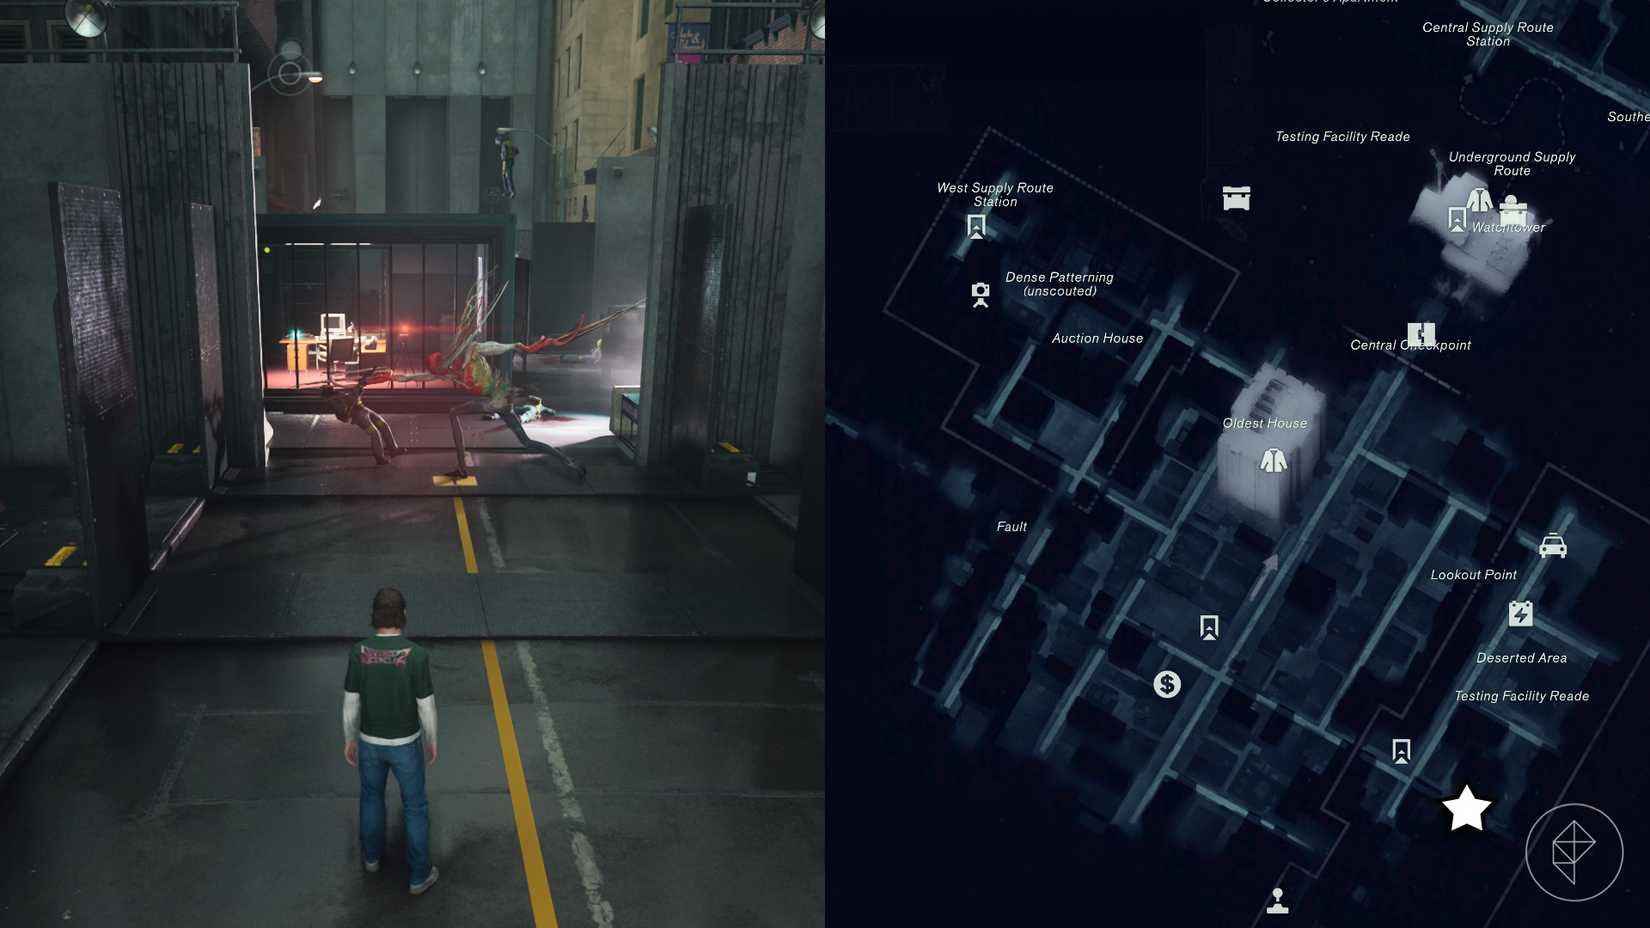
Location: Tucked away in the southeast corner of the eastern Downtown district.
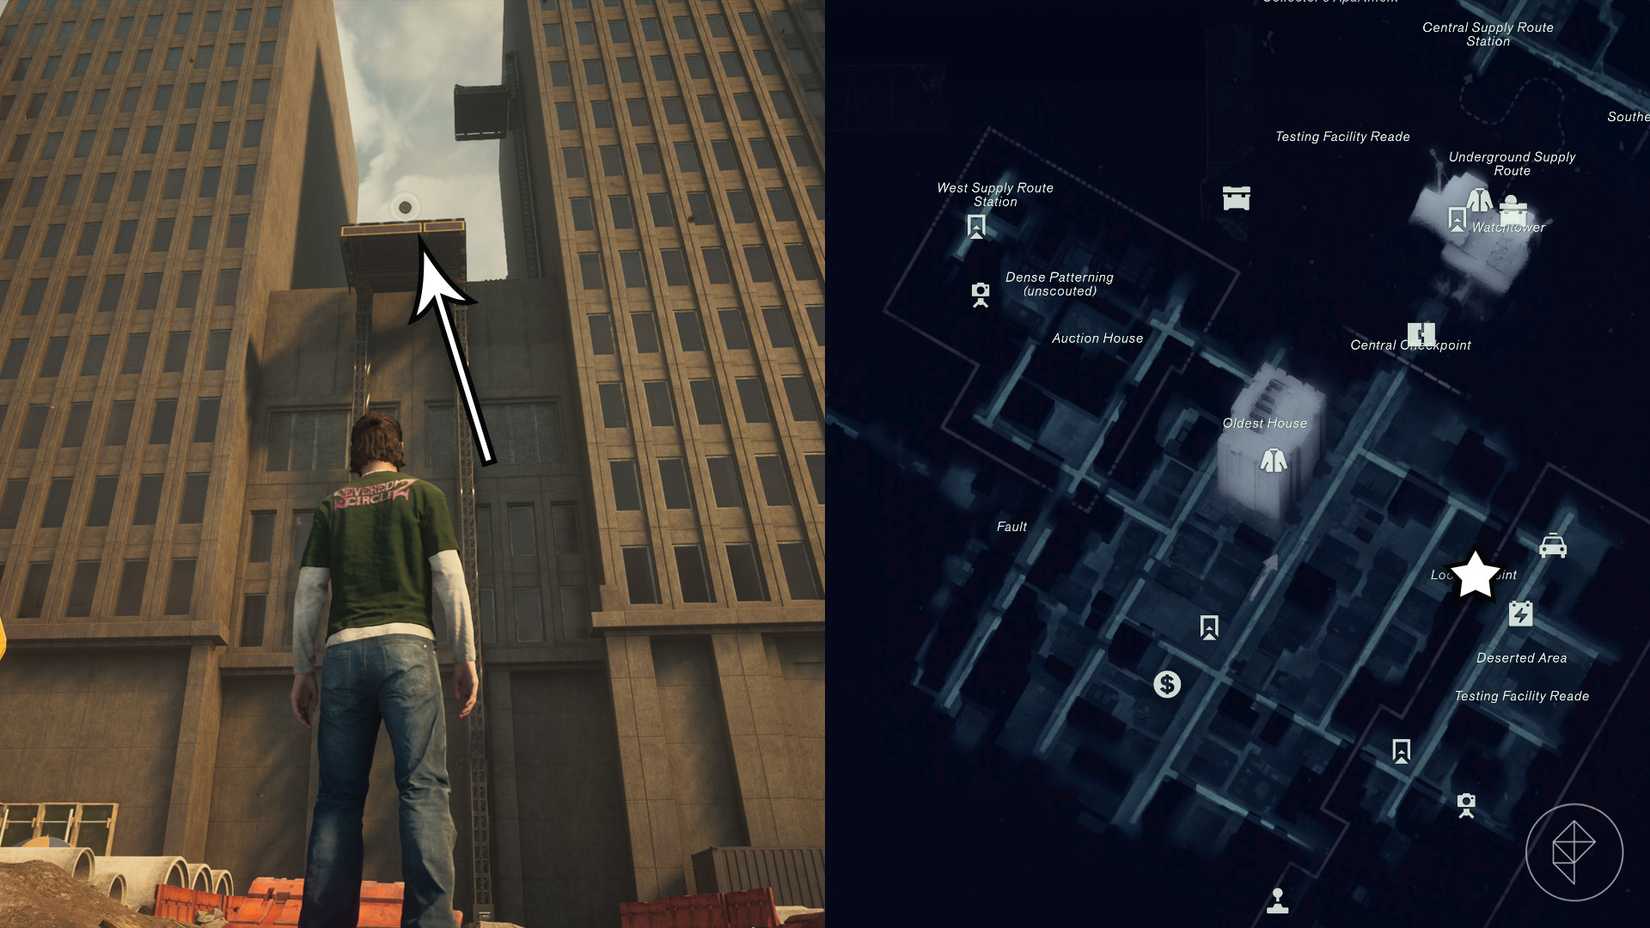
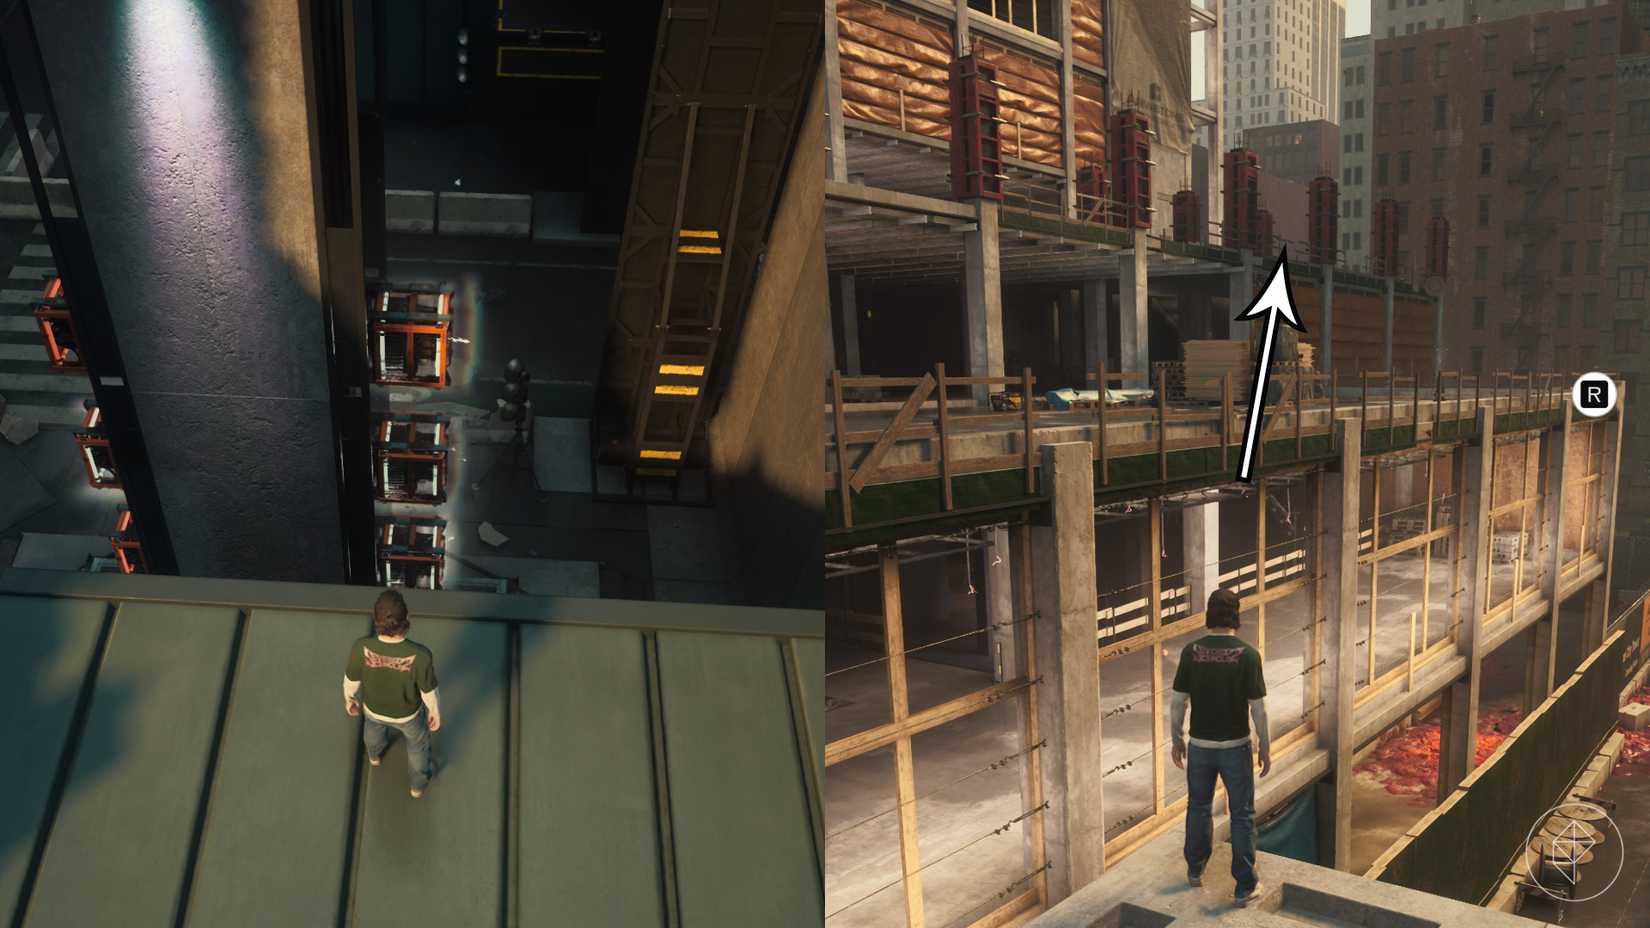
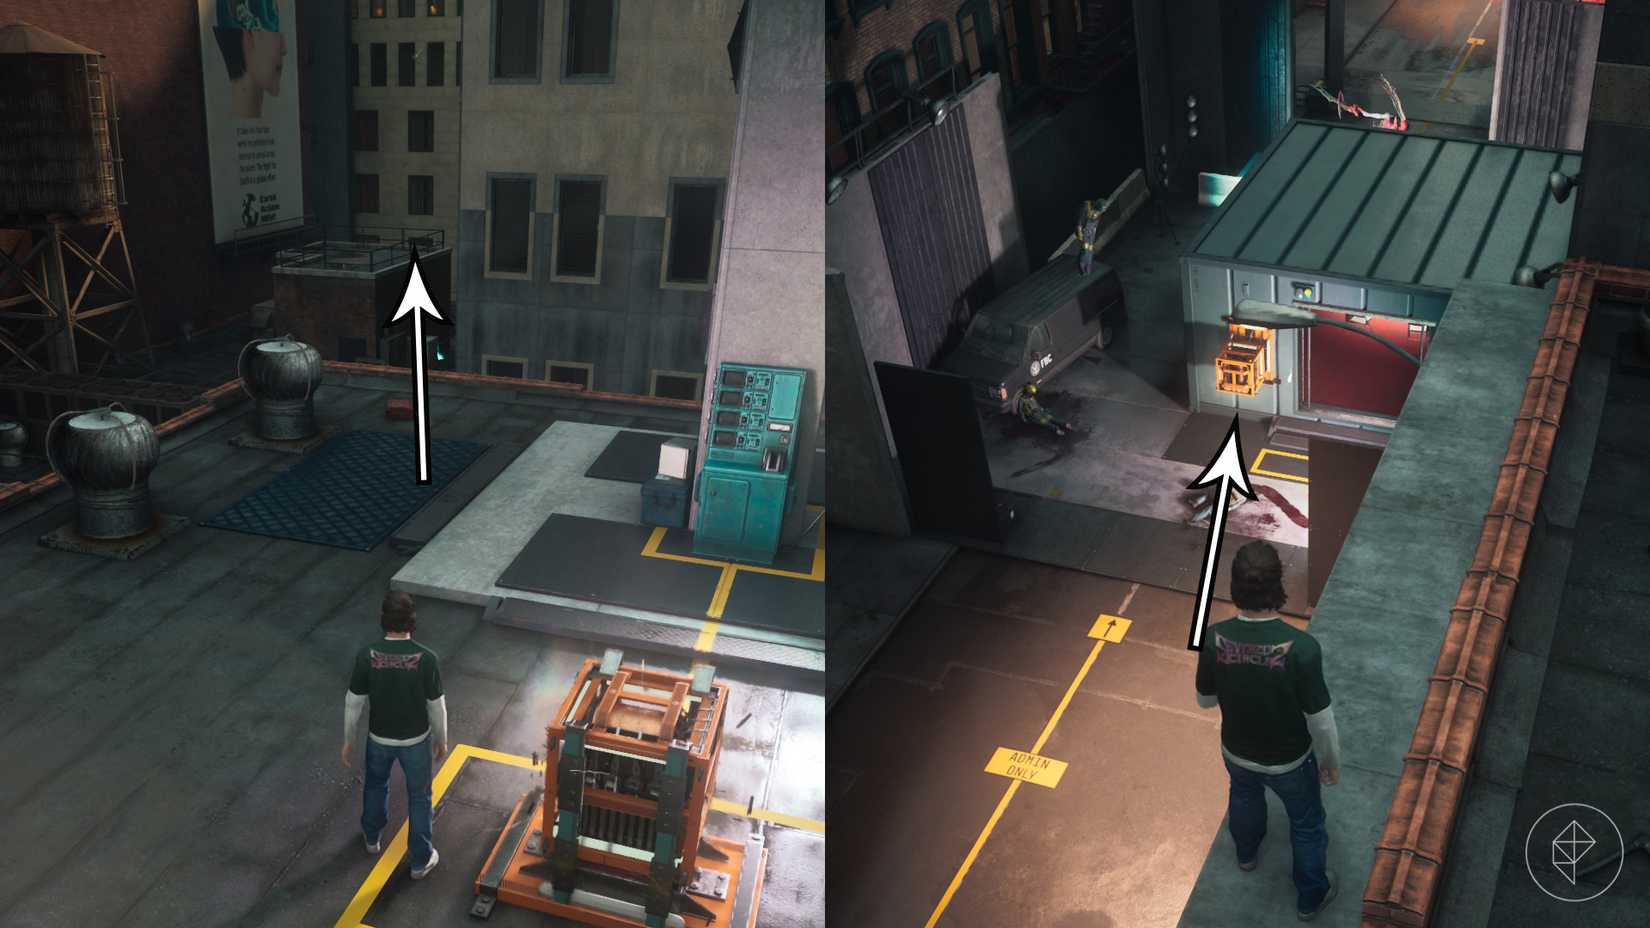
Execution: Make your way to Lookout Point and deploy Reach on the elevated metal platform overhead. Survey the power cores gathered just below you. Jump onto the green storage container building situated to the right of the cores. Strike one core to activate its charge, quickly leap back to the green building, and vault over to the adjacent construction site. Continue moving south until you locate a building with an uncharged power core on its roof. Speed across and strike it to transfer the electrical charge. Finally, sprint between the southern buildings, turn right to spot a third uncharged core on the street below, and strike it from above to unlock the secure room housing the camera.
2. Central "Freeze Frame" Cameras
Central houses the foundational anomalies of the crisis, serving as an introductory lesson in stealth and positioning.
Watchtower Camera
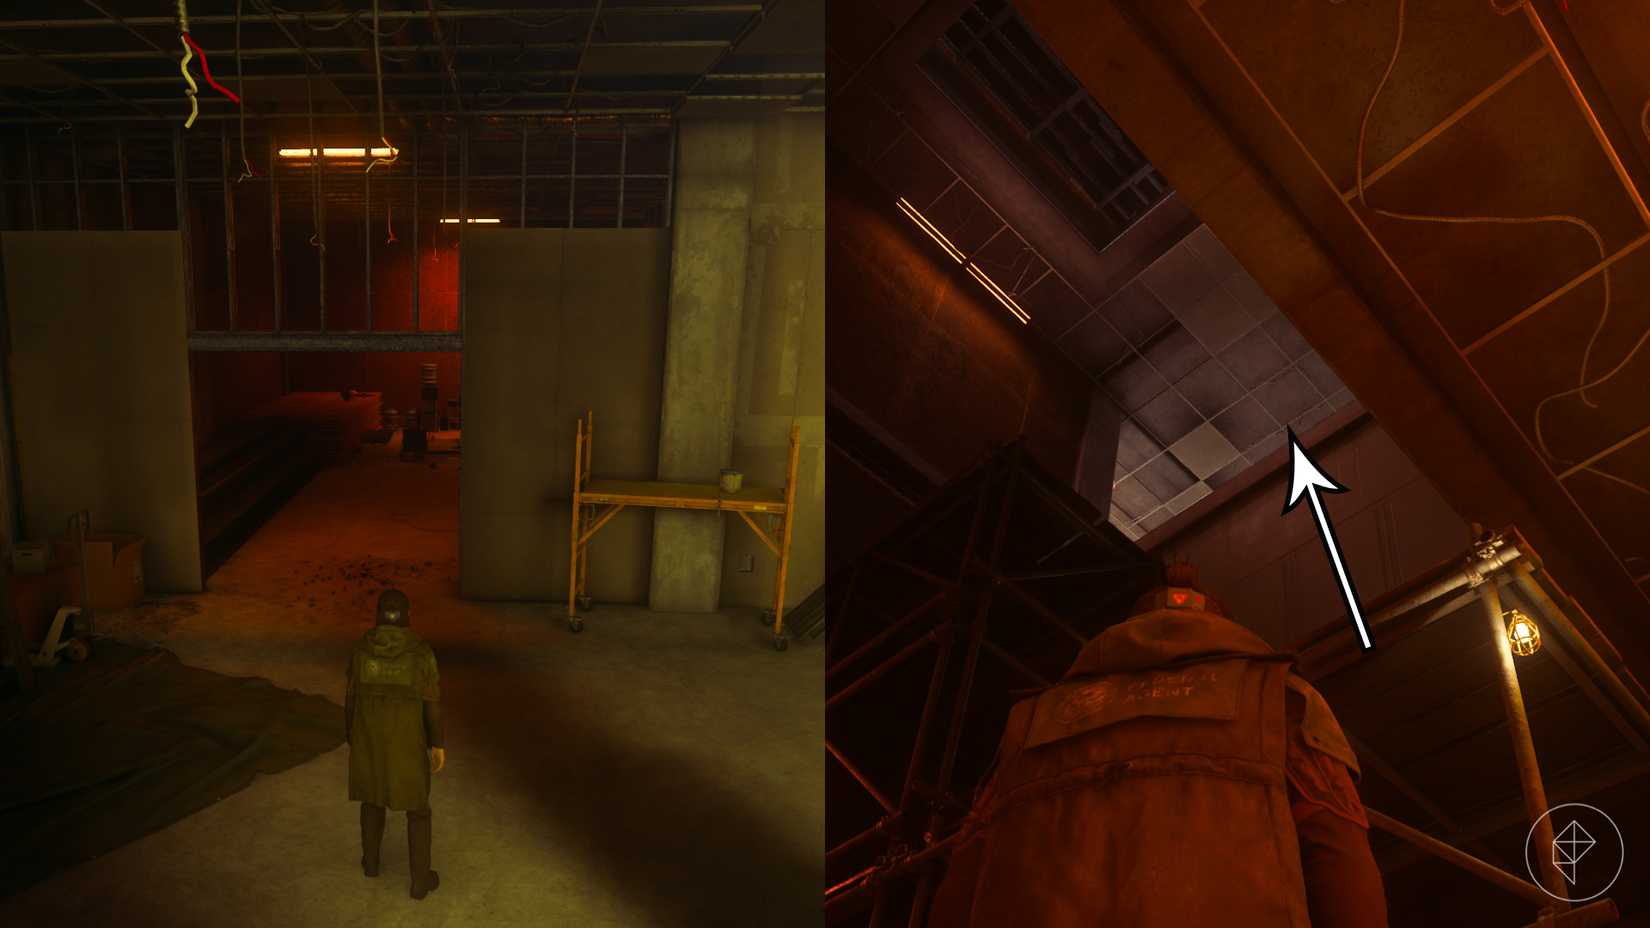
Location: Situated on the lowest floor of the Watchtower structure, precisely one floor beneath the central elevator.
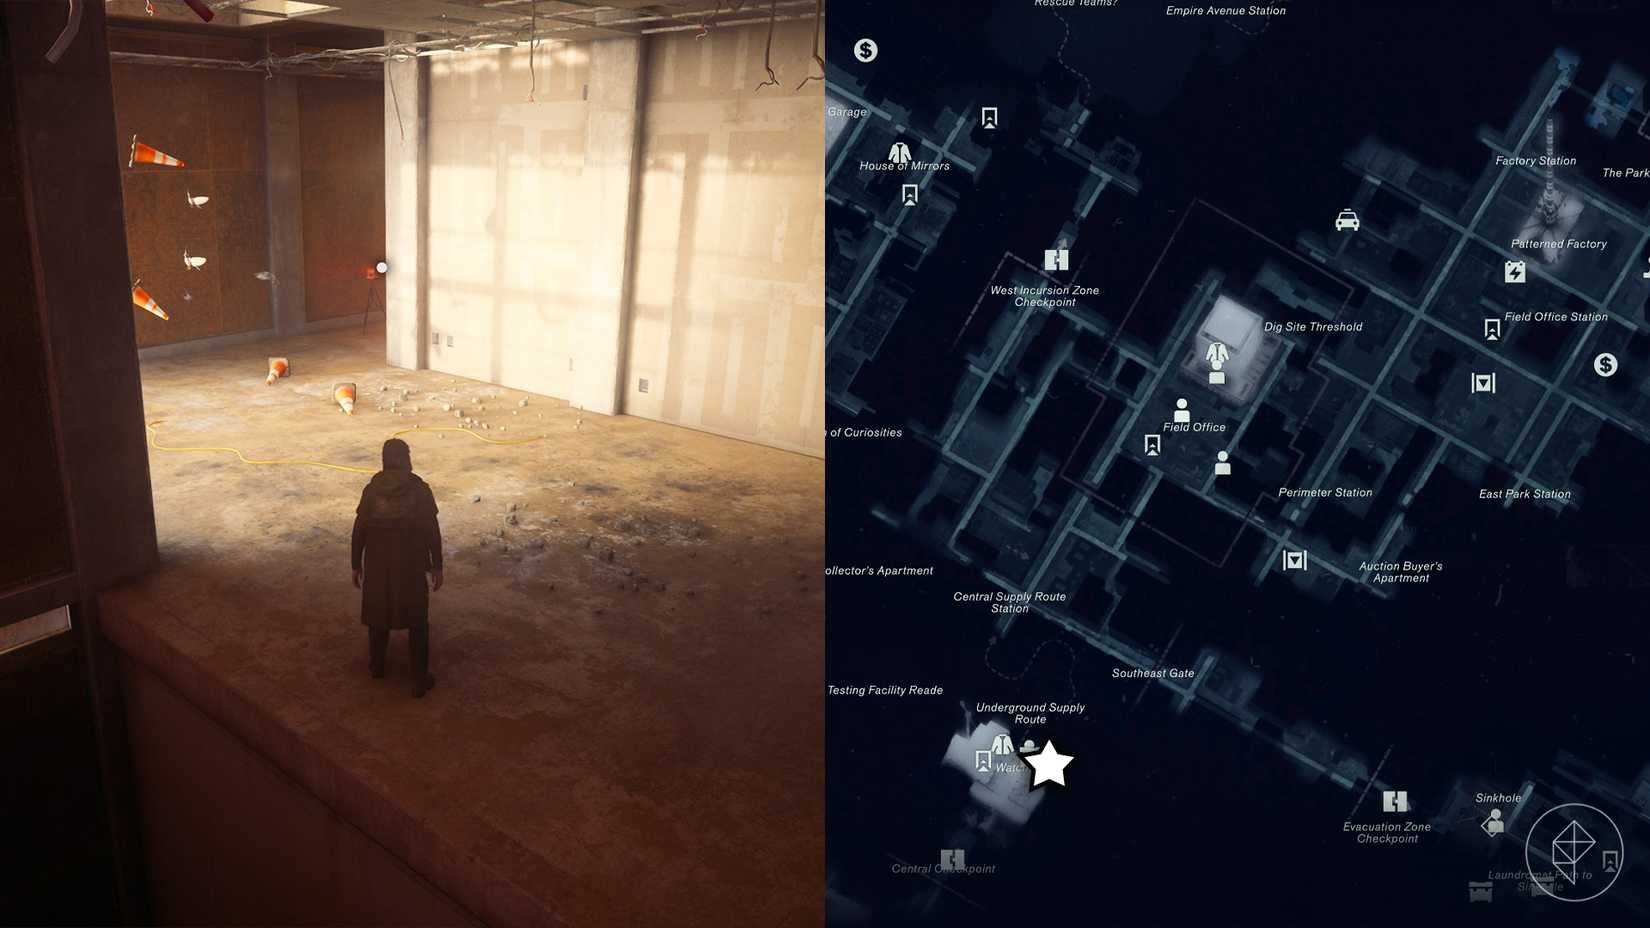
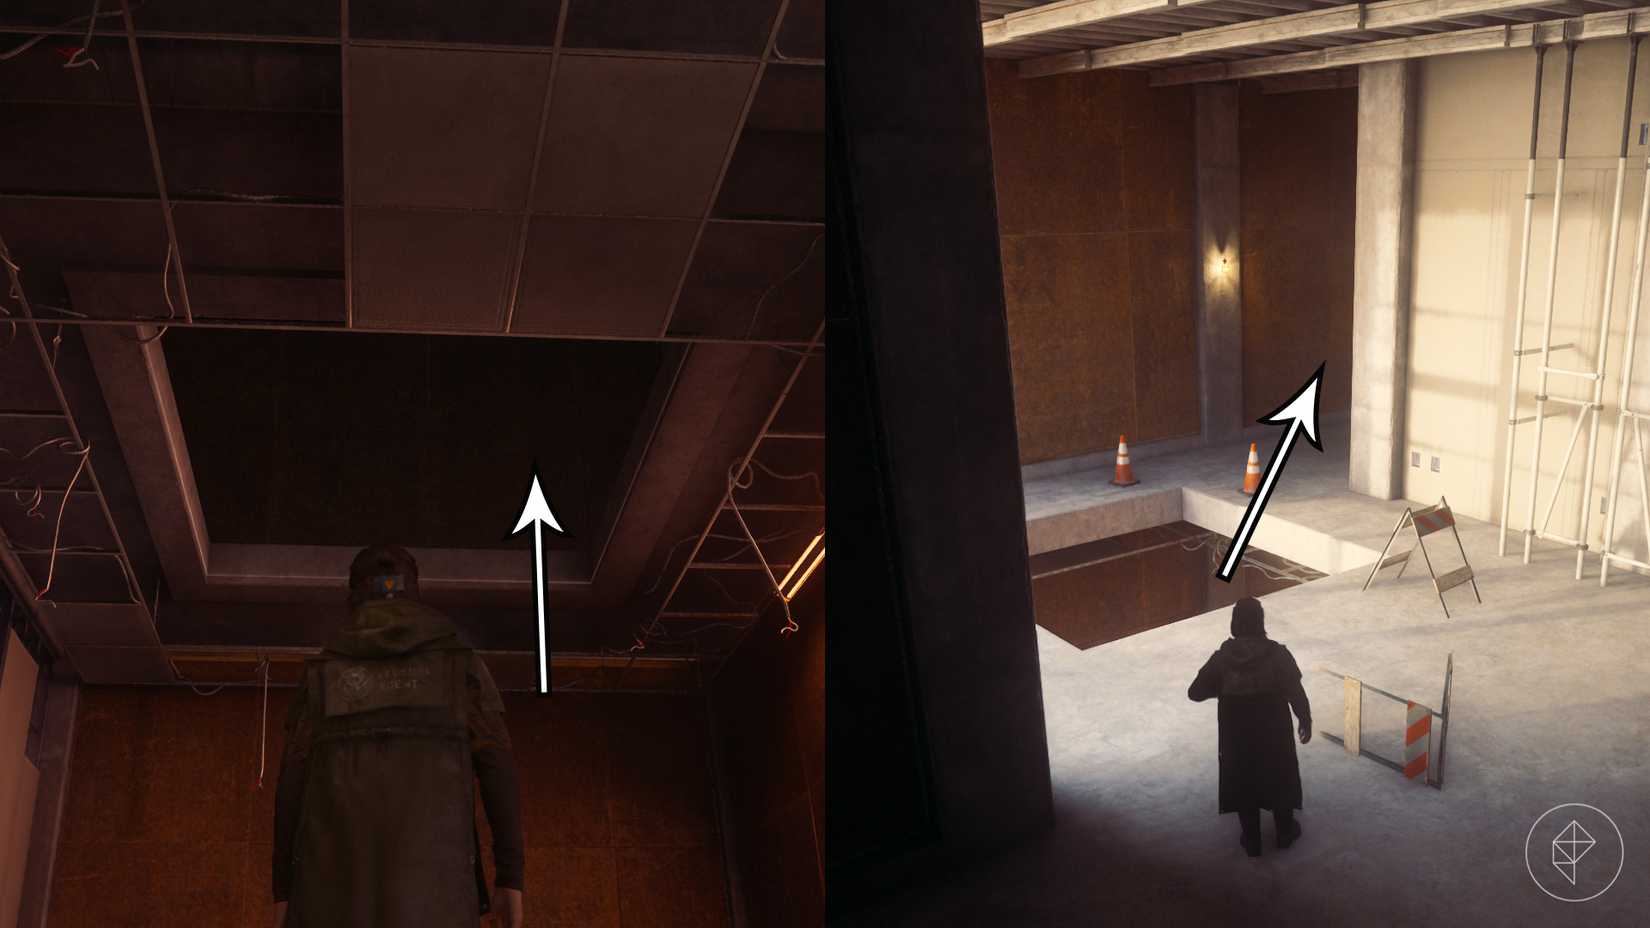
Execution: Descend to the floor and enter the intensely illuminated orange-red room. Scale the scaffolding in the eastern corner, but exercise extreme caution: do not run directly into the hallway at the top. Peering from the edge reveals the camera; crossing its threshold prematurely will trigger an instant snapshot and freeze you in place. Instead, leap through the structural hole in the ceiling, then drop through the subsequent floor opening. This route flanks the camera entirely from behind, allowing for a clean, unmolested shutdown.
Southwest Central Camera
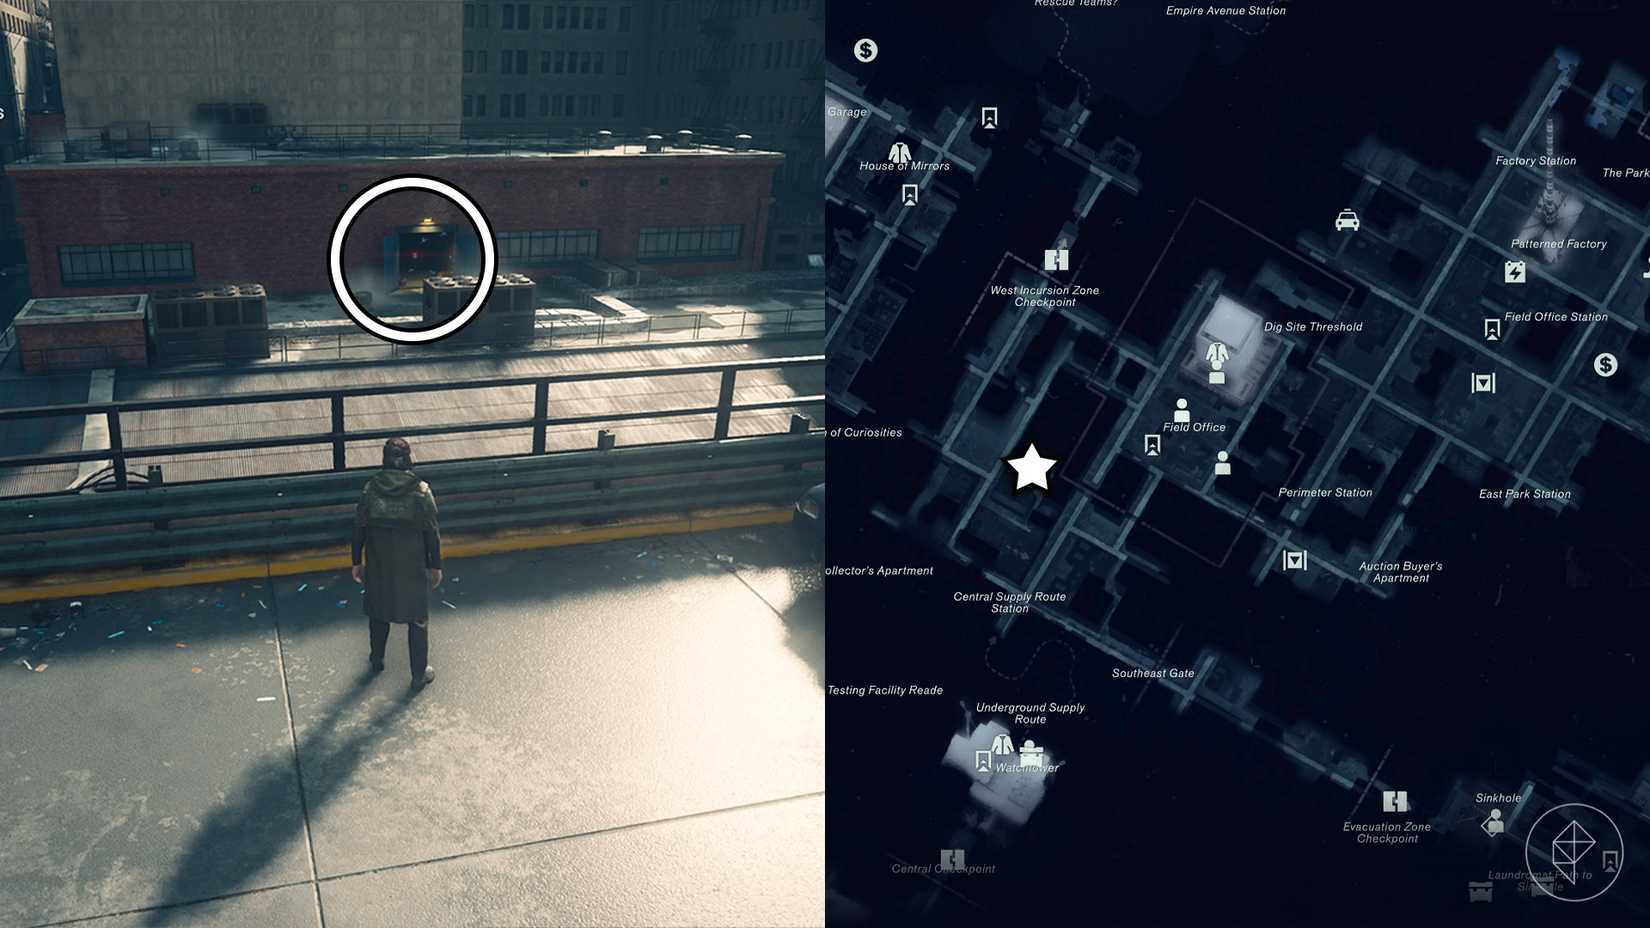
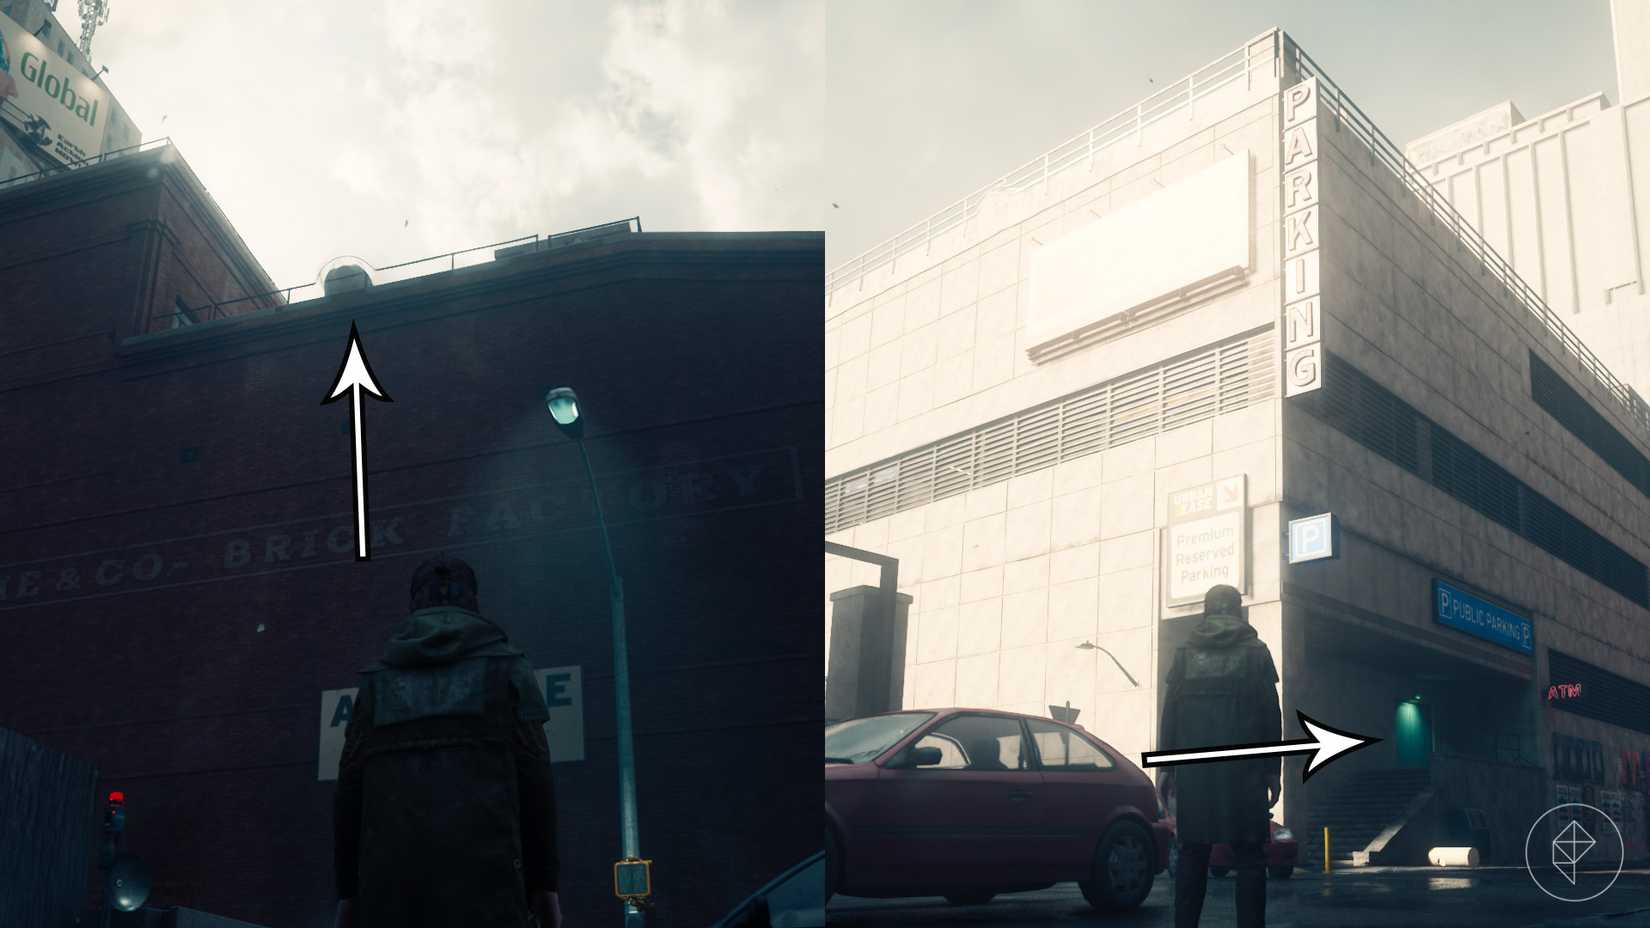
Location: Perched on the top floor of a decaying brick factory located northeast of the central parking garage.
Execution: Operatives can choose between two entry methods. Utilizing Reach is significantly faster and safer, bypassing a hostile militia inside the parking garage; however, standard roof-jumping from the parking garage serves as a viable fallback. For this specific unit, you must intentionally allow yourself to be captured within its field of view. Once the camera temporarily vanishes post-capture, enter the building, clear the ground-floor hostiles, and unlatch the red door leading outside. Stepping out into the open causes the camera to respawn. Retrace your steps back up to the top floor via the interior stairwell, and approach the camera from its blind spot to deactivate it.
3. West Incursion Zone Cameras
Both cameras in this warped sector demand the mastery of the Shift ability, meaning the Parking Garage Incursion Fault must be cleared beforehand.
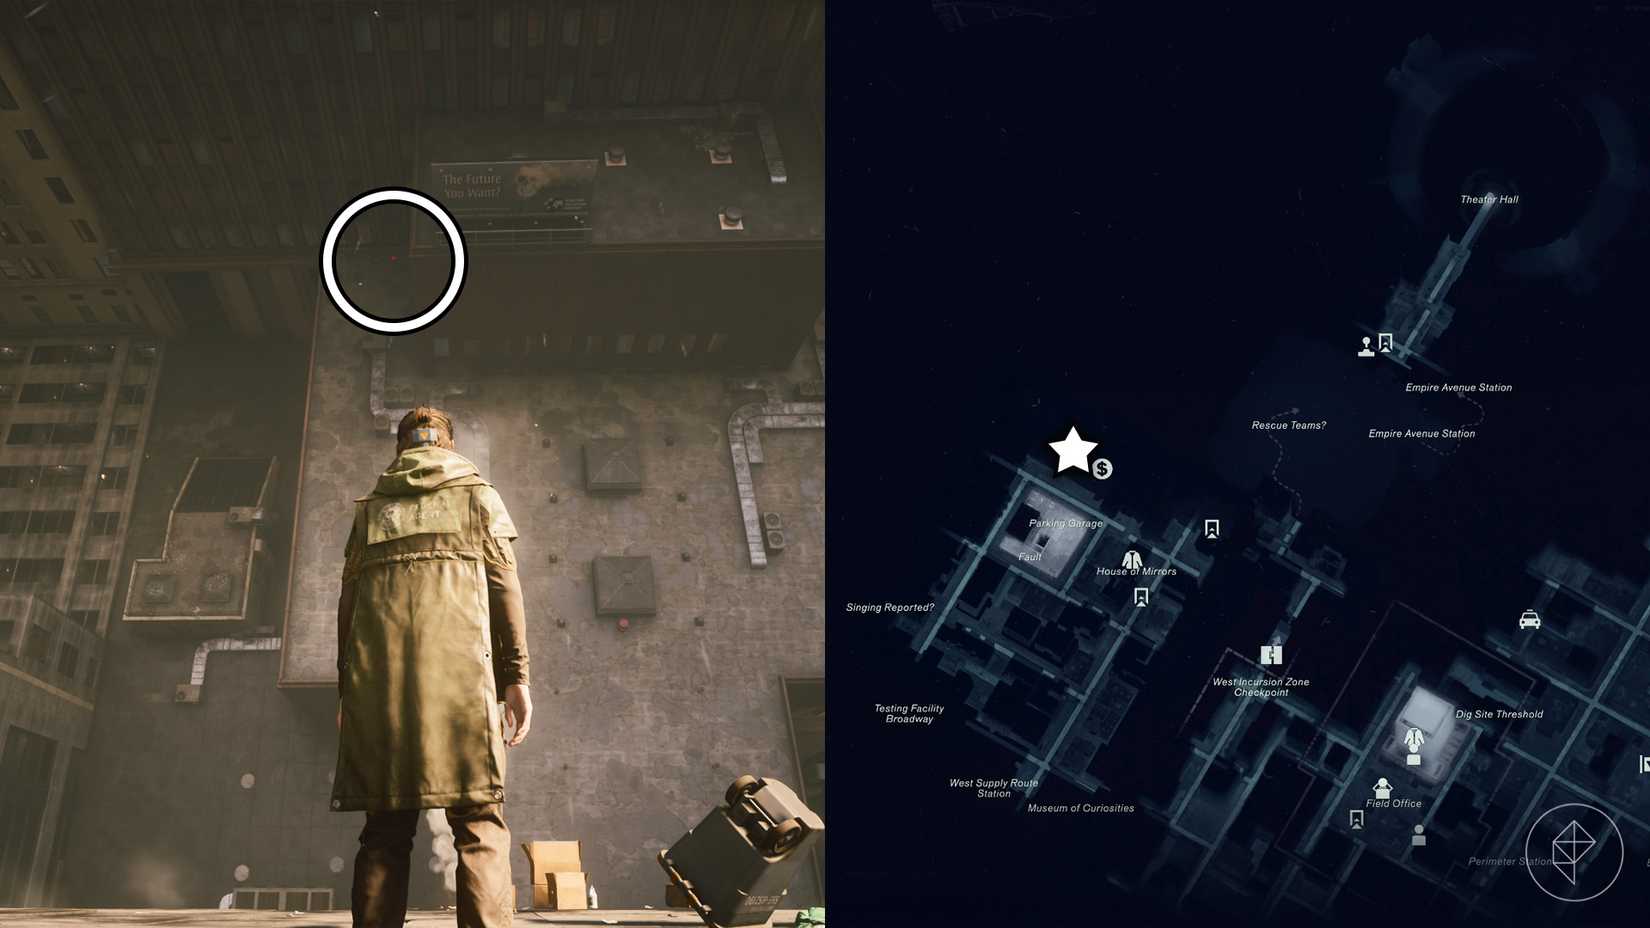
Northeast of the Parking Garage
Location: Positioned on the roof of a sideways, reality-bent building sitting northeast of the Parking Garage.
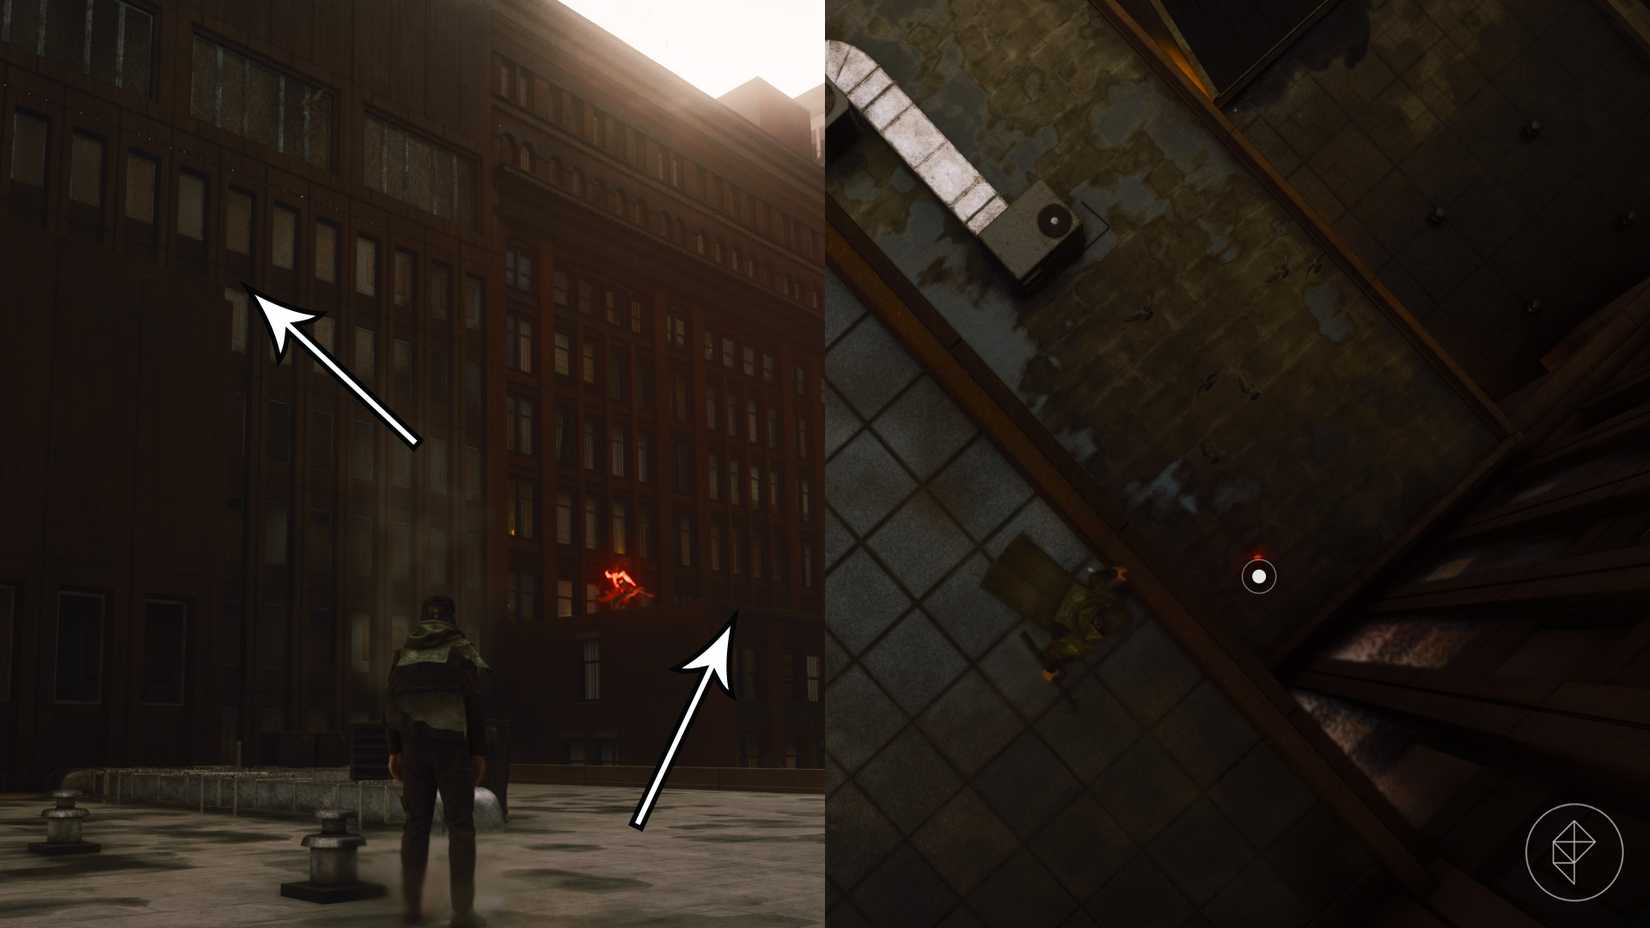
Execution: Use Shift to transition onto the distorted building’s structural plane. Resist the urge to walk straight toward the visible red light of the camera. Instead, skirt to the right and jump to an adjacent rooftop, then double back to a higher tier of the original building. Drop straight down onto the ground directly behind the camera housing to close its lid safely.
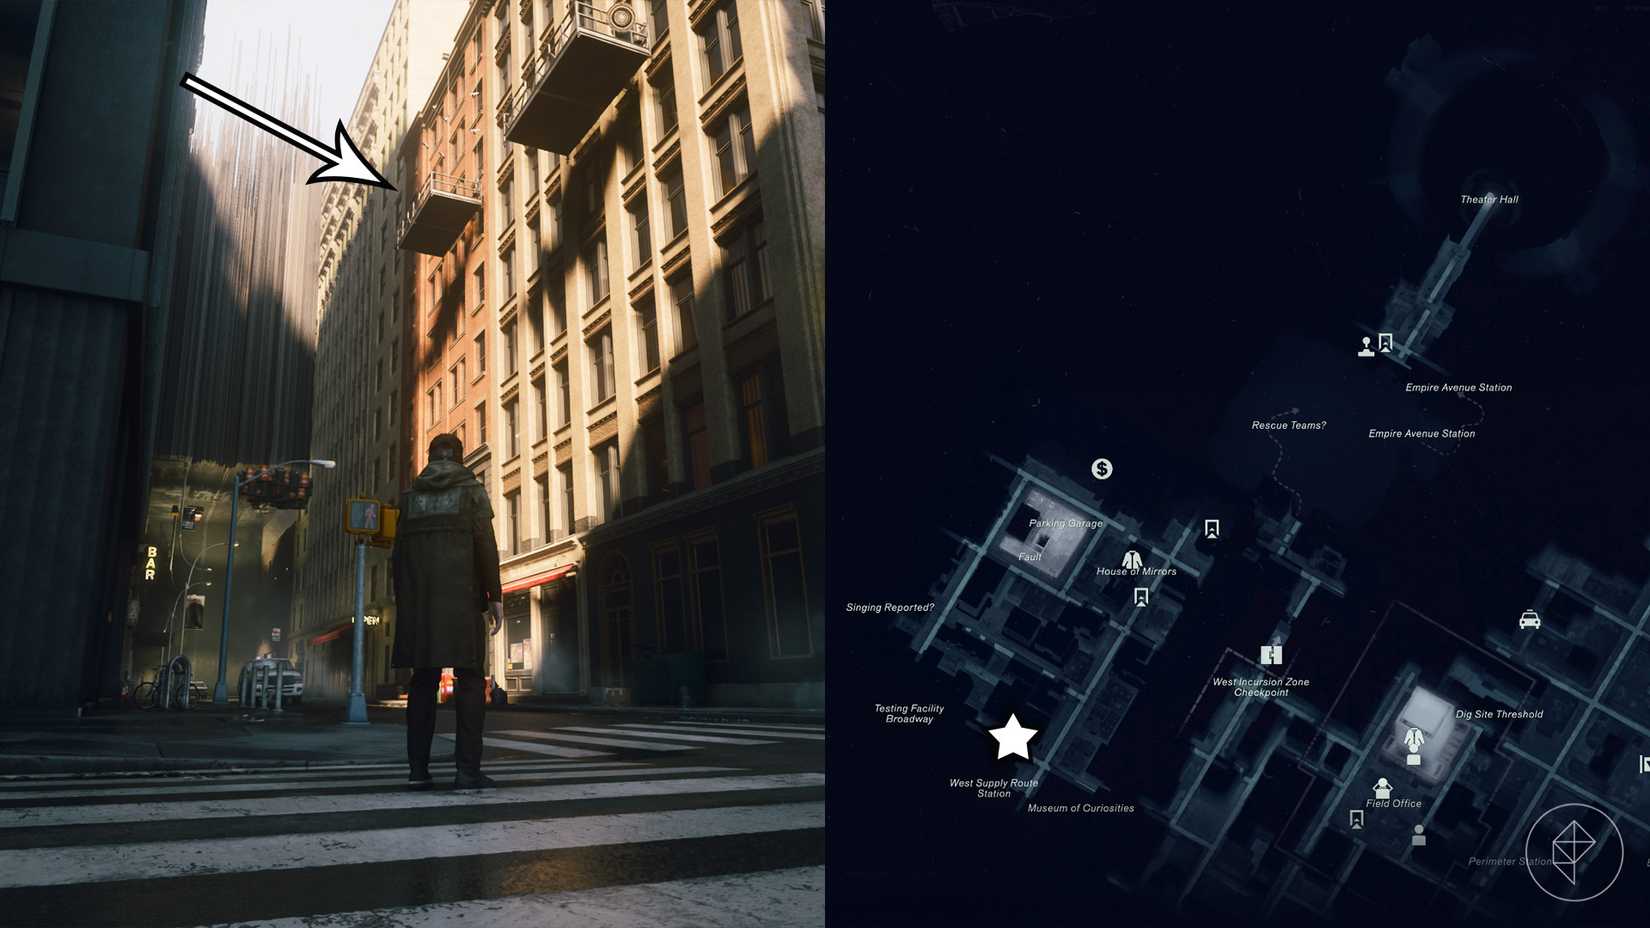
Suspended Scaffolding Camera
Location: Nailed to a suspended scaffolding platform in the southeastern corner of the zone, just northwest of the Museum of Curiosities.
Execution: Walk down the western street and deploy Shift to adhere to the ceiling-plane roadway. Navigate to the edge overlooking a floating debris platform composed of traffic cones and garbage cans. Run (do not jump) off the edge; wait for the visual orientation shift to normalize, then leap across the floating platforms. From the final debris pile, make a clean jump to the elevated suspended scaffolding to land directly in the camera’s rear blind spot.
4. Evacuation Zone "Freeze Frame" Cameras
East Evacuation Zone Camera
Location: Positioned on the eastern flank of the zone, just southwest of the "Main Street" fast travel portal and mapping pylon.
Execution: This unit requires a complex, timed power-circuit relay. Locate the cluster of power cores south of the Evac Building and face west. Strike a core, sprint down the western street, and transfer the charge into an uncharged core positioned right before a security door. Pass through the door (or use Reach to bypass it), grab the charge, and run it further down the street to the next uncharged core. Finally, scale the metal platform leading to the adjacent rooftop, transfer the electricity to the terminal core on top, and use the newly powered access point to breach the room behind the camera.
Northeast Evacuation Zone Camera
Location: Anchored to a rooftop building situated just south of the Railyard Street Station.
Execution: Secure the Reach ability from the Subway Fault inside the Railyard station. Use Reach to scale the exterior wall to the roof. Purposely step into the camera’s sights to trigger its disappearance. Enter the building, descend to the bottom floor, and exit through the front street door—this forces the camera to reset and reappear on the roof. Retrace your internal path back to the top floor to emerge directly behind the lens.
5. The Park "Freeze Frame" Cameras
Sewer Entrance Camera
Location: Mounted on a suspended scaffolding platform outside the southern sewer entrance of The Park (accessible by traversing through the northern sewer network).
Execution: Locate the uncharged power core down the road beneath the elevator. Retrieve a charge from a neighboring active core to the south, transfer it to the elevator mechanism, and ride the platform to the upper tier. Glide across the atmospheric gap to land securely on the scaffolding platform situated directly behind the target camera.
Nomad Avenue Station Camera
Location: Deep within the subterranean corridors of Nomad Avenue Station in the southwest sector of The Park.
Execution: Descend the station steps to spot the camera on your right. Follow the branching path to the left until you encounter a reinforced door choking under thick, white mold webs. Deploy either the Ignite or Inferno combat ability—unlocked by defeating The Deserter resonant in Central—to incinerate the blockage. Follow the clear corridor beyond to loop around directly behind the camera terminal.
6. Underpass "Freeze Frame" Cameras
Northeast Underpass Camera
Location: Set inside a structural pillar near the zone entrance, marked by a line of glowing glow sticks leading toward The Spire.
Execution: Approach the pillar hosting the camera and frozen NPC hostiles. Do not advance toward the lens; instead, look directly beneath the camera housing to spot a designated Reach anchor point. Pull yourself up, clear the localized threats, and drop down into the structural maintenance hole. Navigate the northwestern hallway to reach the camera’s rear access panel.
South of Tubes Island Camera
Location: Mounted inside a high wall aperture on the pillar south of Tubes Island.
Execution: Cross the pillar network west of The Spire. Upon entering the blue-mold-infested island room, recognize that the aperture is too high to reach via standard Elevate jumps. Instead, take the right-hand corner and use Reach to latch onto the red-carpeted ceiling surface. Deploy Shift to traverse the wall horizontally until you locate a maintenance hole in the floor. Land precisely on the blue mold patch in the corner, drop through the secondary floor opening below, and you will find yourself safely behind the camera.
7. Unknown Sector "Freeze Frame" Cameras
Construction Site Camera
Location: Situated on the bottom floor of a construction site within the upside-down sector of the central island.
Execution: Ascend to the second floor of the construction site from the Oldest House approach (using Shift/Reach as needed) and take the interior stairwell downward. Prepare for an aggressive ambush of warped entities. Once cleared, inspect the massive mold growth near the middle of the eastern wall, adjacent to the stairs; the camera is housed directly to its left.
Factory Island Camera
Location: Housed inside the "Wear’Em & Wash’Em" laundromat on Factory Island in the southwest sector of the Unknown zone.
Execution: Teleport directly via the "Factory Island" fast travel node or glide across using Pope’s research balloon pylons. Spotting the laundromat on the vertical street will trigger a freeze hazard if approached head-on. Instead, use Reach to scale the building on the right side of the street, cross the rooftops, and drop into the rear alleyway. Enter through the open garage door and navigate the back offices to flank the camera.
Supporting Context & Metrics: The Downtown Containment Gauntlet
Once all individual cameras across the map have been deactivated, Director Zoe contacts the player via the Bureau hotline, reporting that the remaining rogue units have massed outside the threshold of the Oldest House. Arriving at the scene reveals an unprecedented tactical hurdle: seven fully active cameras standing in an unbroken, interlocking line.
Mechanics of the Gauntlet
Chain Reaction: Deactivating any single camera’s lid causes the remaining units to instantaneously teleport to a new tactical vantage point.
Punishment Loops: If a player’s path crosses any active lens during the sequence, the entire encounter resets to the previous phase, forcing a retry.
Directional Approach: Operatives must always initiate encounters from the eastern approach. Attempting to engage from the west places you immediately within their overlapping fields of view.
Step-by-Step Containment Protocol
Phase One (Initial Line): Approach from the eastern flank. Deactivate any camera in the line. The remaining units will instantly teleport to a northern rooftop.
Phase Two (Northern Roof): Move into the northeastern alleyway and utilize the structural metal platform to scale the target roof without crossing active sightlines. Close the lid on the designated camera.
Phase Three (Green Building Cluster): The units split between a green building and street level. Drop down, loop to the brick building southwest of the zone, and use Reach to scale its roof. Drop down behind the elevated cameras to shut one down.
Phase Four (Street-Level Split): Two cameras remain on the roof and two on the street. Leap over the courtyard wall, loop around the northern sector to find the rear access door for the ground units, and disable one.
Phase Five (Concrete Wall): The remaining units reposition to the southwest concrete wall. Return to the trusted brick building vantage point and vault directly onto the wall from behind to shut them down.
Phase Six (Final Unit): The ultimate camera retreats to its original spawn point in the dead center of the plaza. Flank it from behind and shut its housing for the final time.
Official Statements & Lore Implications
Remedy Entertainment’s narrative and design teams have praised the "Freeze Frame" quest as a masterclass in blending environmental puzzle-solving with the existential dread characteristic of the Control universe.
In a recent developer debrief, Lead Level Designer Marcus Vance noted:
"We wanted an encounter that weaponized spatial awareness. In Control, players are used to dominating spaces through raw firepower and kinetic force. With the cameras, we forced a paradigm shift—literally. You cannot brute-force a lens that freezes reality. You have to understand the geometry of the architecture, read the shadows, and use the Bureau’s traversal tools like surgical instruments."
Lore-wise, Bureau dispatch logs suggest these cameras are manifestations of an autonomous information-harvesting parasite originating from a previously uncatalogued resonance plane. By recording human movement, the entities attempt to "pin" dynamic reality into static, two-dimensional photographs, effectively arresting the perpetual evolution of the Oldest House’s shifting corridors.
Future Outlook: Rewards and Post-Quest Replayability
Completing the grueling Downtown containment gauntlet rewards the player with the blueprint for the Shiny Pebble artifact recipe.
Unlike standard defensive mods, the Shiny Pebble introduces a powerful passive sustainability loop: while operating within active gravity anomalies (such as those found throughout the Incursion Zones and the Unknown sector), the artifact gradually restores the player’s health up to a 50% threshold. This makes it an essential loadout piece for endgame mastery in Control Resonant, particularly when tackling upcoming higher-tier Bureau Alerts and anomalous boss encounters.
As players continue to scour the altered world of Control Resonant, the containment of the "Freeze Frame" anomaly serves as proof that methodical investigation, precise platforming, and mastery of supernatural traversal remain the Federal Bureau of Control’s most formidable weapons against the unknown.