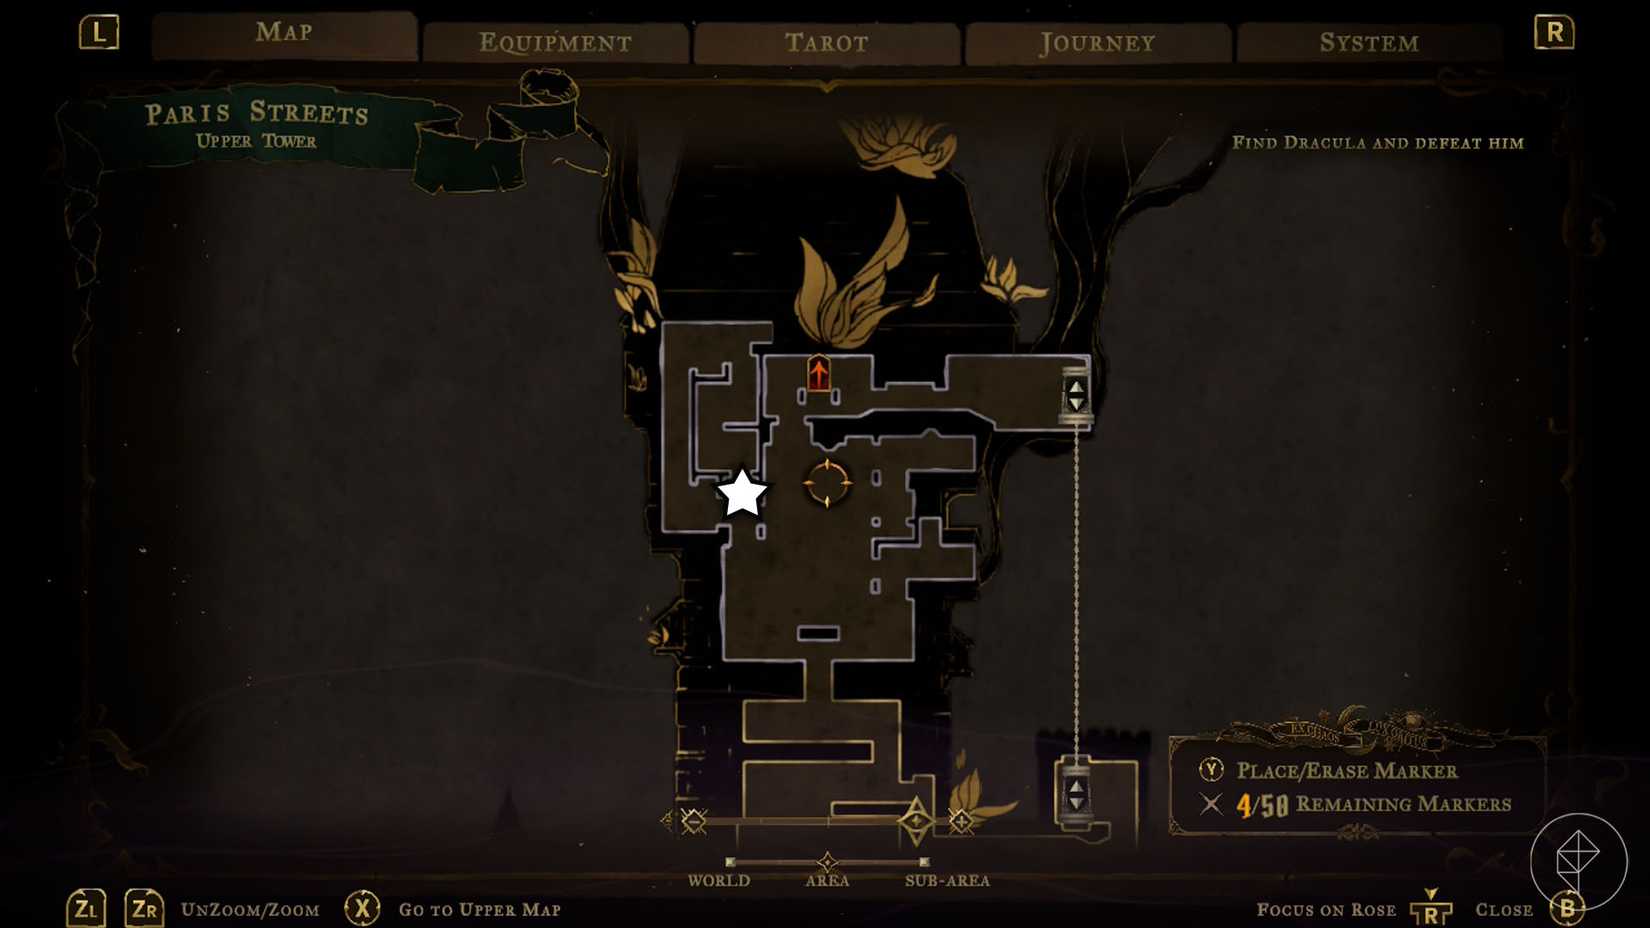
The landscape of modern metroidvania design continues to evolve, pushing players past traditional reflexes and into spatial mastery, environmental deduction, and resource management. Within Konami and Evil Empire’s latest dark-fantasy entry, Castlevania: Belmont’s Curse, players are constantly forced to reevaluate their surroundings. Among the game’s early-game gauntlets, few locations inspire as much tactical frustration and structural perplexity as the Prison Tower.
Dominating the western expanse of the Paris Streets map, the Prison Tower serves as a vertical crucible. At its apex waits the Warrior, a formidable early-game gatekeeper whose defeat is mandatory for opening the path to the catacombs. However, simply scaling the fortress walls through raw acrobatic execution proves impossible. Traditional platforming yields dead ends, and standard traversal mechanics fall short of bridging the chasm separating the Upper Tower from the Roof of the Tower.
To overcome this structural barrier, players must engage in an intricate environmental puzzle involving a cryptic spirit, a hidden blueprint, and a mechanically operated contraption known as the carpenter’s crane. This comprehensive guide provides an authoritative, step-by-step breakdown of how to navigate the tower’s verticality, locate the vital intel, and successfully operate the carpenter’s crane to secure safe passage to the tower’s summit.
Detailed Chronology & Tactical Walkthrough
Successfully scaling the Prison Tower requires a methodical approach. Because the environment is rife with environmental hazards, timing-based traps, and complex grapple point configurations, players should approach the climb with patience and absolute precision.
Phase 1: Locating the Prison Tower and Assessing the Blockade
Your journey toward the Warrior begins on the Paris Streets map.
The Approach: Head directly north from the Gate to the Catacombs, then pivot west until you reach the imposing gates of the Prison Tower.
The Obstacle: Upon entering, you will find that while the lower and middle floors are fully explorable—utilizing adjacent buildings to lower gates that double as platforms and swinging points—the ultimate pathway leading to the Roof of the Tower map is sealed tight.
The Missing Link: The door is entirely unresponsive to standard interaction. To bypass this barrier, you must unearth a hidden crane operated through a specific mechanical sequence housed deep within the tower’s upper fortifications.
Phase 2: Uncovering the Spirit’s Secret
Before you can locate the crane itself, you must gather critical intelligence regarding its existence and mechanism. This information is held by a spectral entity residing on the western flank of the Upper Tower segment.
Navigating the Western Anchors: From the central interior of the Upper Tower, swing across two distinct yellow anchor points positioned to the west. This will land you safely on a small platform housing a prominent control lever.
Surmounting the Trap-Ridden Wall: While the spirit rests directly above this platform, a direct vertical ascent is blocked. Instead, look to the path on the left, which is densely packed with localized hazards and timing-based traps. You must execute rapid, alternating wall-jumps to scale the vertical shaft safely.
The Left-Corner Platform and Hidden Collectible: Once you reach the apex of this wall-jump sequence, swing toward a modest platform tucked into the far-left corner of the chamber. (Note: Players possessing a keen eye can shatter the wall on the immediate right side of this landing to reveal a hidden "defense up" collectible—a vital permanent upgrade for the impending boss fight against the Warrior).
Whipping the Void: From the left-corner platform, drop downward and time your whip strike carefully. You must latch onto a purple anchor located on the left wall, using its momentum to immediately slingshot yourself toward a secondary purple anchor on the right.
The Encounter: Successfully navigating this dynamic sequence brings you face-to-face with the spirit. Upon interaction, the spirit imparts the location of the carpenter’s crane and provides a weathered sketch illustrating the structural anchor required to unlock the crane’s access door. However, due to the cryptic nature of the sketch, deciphering its literal location on the world map requires precise cross-referencing.
Phase 3: Securing and Operating the Carpenter’s Crane
Armed with the spirit’s intel, you must retrace your steps to operationalize the machinery.
Returning to the Base: Drop back down to the lower tier of the Prison Tower. Navigate your way to the exact level housing the Mirror of Life room.
The Exterior Approach: Head west out of the tower interior. Before stepping fully outside, target a nearby purple anchor to launch yourself from the wall toward an adjacent yellow anchor.
The Slingshot Maneuver: Swing dynamically back toward the tower structure to target a second purple anchor positioned at a slightly higher elevation. Executing this cleanly will deposit you onto a secluded, high-altitude platform in the northeastern sector of the Prison Tower map.
Triggering the Mechanism: Look to your right to spot a standard yellow anchor. Use your whip to swing across the gap, landing near a specialized yellow anchor distinguished by a wooden hexagon mounted directly above it.
Activating the Crane: Latch onto this hexagon-marked anchor and execute a synchronized swinging motion precisely three times. This kinetic force trips the internal winch system, unlocking the heavy iron doors that bar entry to the carpenter’s crane.
Final Ascent: Board the newly operational carpenter’s crane. Let its automated pulley system carry you upward past the structural dead-ends, depositing you directly outside the heavy oak threshold leading to the Roof of the Tower—and your ultimate confrontation with the Warrior.
Supporting Context & Level Design Metrics
To fully appreciate the architectural complexity of the Prison Tower in Castlevania: Belmont’s Curse, it is helpful to examine the development philosophy governing Evil Empire’s level design methodology.
Unlike linear entries in the franchise’s past, Belmont’s Curse employs an interconnected spatial matrix heavily inspired by classic 2D platforming puzzle logic. The Prison Tower specifically functions as a vertical gating mechanism. Developers intentionally designed the environment to break psychological expectations: players naturally assume that reaching a higher altitude requires continuous upward progression. By forcing a descent back down to the Mirror of Life level after acquiring high-altitude intel, the game subverts traditional muscle memory, rewarding careful map reading and spatial retention over mindless button-mashing.
Furthermore, environmental metrics within the tower dictate that players master momentum retention:
Whip-Swing Velocity Window: The transition window between the initial purple anchor and the secondary yellow anchor requires a release input within a 0.4-second tolerance window to maintain sufficient velocity.
Hexagon Anchor Resonance: The wooden hexagon anchor functions on a mechanical tension system. Striking it fewer than three times fails to disengage the winch latches, while over-swinging risks destabilizing the player’s positioning, dropping them back to the lower structural tier.
Official Statements & Developer Insights
Speaking on the design philosophies driving Castlevania: Belmont’s Curse, lead developers from Evil Empire and Konami have repeatedly emphasized their commitment to marrying classic gothic atmosphere with modern puzzle-platforming depth.
"We didn’t want players to simply walk into a room, clear out a wave of standard ghouls, and instantly unlock a boss arena," noted a senior environment designer during a recent production roundtable. "The Prison Tower is designed to test your observational skills just as much as your reflexes. When you talk to the spirit, we aren’t just giving you a waypoint marker—we are giving you a visual riddle. Deciphering the carpenter’s crane schematic and realizing you have to loop back down to the Mirror of Life level to access the northeastern winch is meant to create that classic ‘lightbulb’ moment that defines the greatest exploration-driven games in the genre."
Konami producers further elaborated on the integration of classic items and structural machinery within the Belmont universe, noting that environments like the Prison Tower serve as narrative connective tissue between the overarching gothic tragedy and the mechanical ingenuity required for monster hunting.
Future Outlook & Community Implications
As Castlevania: Belmont’s Curse marches toward its official release following its current development builds, community response to intricate environmental puzzles like the carpenter’s crane has been overwhelmingly positive. Early playtesters and Metroidvania purists have praised the game’s refusal to rely on hand-holding markers, noting that cryptic spatial navigation restores a sense of genuine discovery reminiscent of genre-defining classics.
Looking ahead, speedrunning communities and challenge-run creators are already analyzing the Prison Tower layout for optimization routes. The requirement to backtrack to the Mirror of Life room introduces fascinating risk-reward variables for low-time and low-item completion categories. Mastering the exact three-swing cadence on the wooden hexagon anchor will undoubtedly become a benchmark skill for elite players looking to dominate global leaderboards.
For now, everyday players tackling the tower for the first time should keep their whips sharp, study their maps closely, and remember: in the shadowed halls of Castlevania, the longest way around is often the only way up.