
Executive Overview
Wall-mounting a flat-screen television or high-definition computer monitor is one of the most effective ways to reclaim living space, optimize viewing angles, and achieve a clean, modern aesthetic in a home or office. Yet, for many consumers, transitioning a display from a traditional media console to a wall bracket introduces a maze of confusing technical specifications. Chief among these is the acronym "VESA"—a term frequently encountered on retail packaging, instruction manuals, and product description pages, but rarely explained in plain English.
Contrary to popular belief, a VESA measurement is neither a display resolution standard nor a proprietary bracket type. Rather, it is a universally recognized, standardized system established by the Video Electronics Standards Association that dictates the exact geometric placement of threaded mounting holes on the back of electronic displays.
While understanding VESA dimensions is the critical first step in selecting compatible mounting hardware, it represents only half of the equation. Homeowners and office managers frequently make the critical mistake of assuming that if a bracket’s VESA pattern matches their television, the installation is guaranteed to be safe. In reality, a successful, secure wall-mount installation requires a holistic evaluation involving precise measurement techniques, stringent weight-capacity verifications, correct hardware selection, and structurally sound wall anchoring. This comprehensive guide breaks down everything you need to know about VESA standards, how to locate your display’s specific pattern, and the crucial safety parameters required to protect your investment—and your home.
Detailed Chronology and Evolution of the VESA Standard
To truly appreciate the simplicity and utility of modern TV mounts, it is helpful to look back at how the industry evolved. In the early days of consumer electronics, mounting a heavy cathode-ray tube (CRT) television or professional display was an ad-hoc, structurally hazardous undertaking. Every manufacturer used proprietary screw placements, custom chassis designs, and unique bracket systems. If you purchased a new TV, your old wall mount became instantly obsolete, forcing you to drill entirely new holes and buy matching proprietary hardware.
Recognizing the chaotic state of the display market, consumer electronics brands, manufacturers, and engineers coalesced around a unified governing body: the Video Electronics Standards Association (VESA). Originally formed in 1989 to establish video display standards for personal computers (such as the SVGA graphics standard), VESA gradually expanded its scope to address physical hardware interoperability.
- The Late 1990s to Early 2000s: As flat-panel LCD and plasma technologies began replacing bulky CRTs, VESA introduced the Flat Display Mounting Interface (FDMI) standard. This breakthrough initiative established a standardized matrix of mounting holes on the rear panels of displays, categorized by screen weight and size classes.
- The Standardization Era (2000s–2010s): The FDMI standard drastically simplified manufacturing and retail. Brands like Sony, Samsung, LG, and Panasonic adopted the uniform layout, allowing third-party engineering companies to manufacture universal mounting brackets. Consumers were freed from the ecosystem lock-in of proprietary hardware.
- The Modern Era (Present Day): Today, nearly every consumer television, professional computer monitor, and commercial digital signage display adheres strictly to VESA mounting conventions. The standard has evolved to accommodate ultra-lightweight OLED panels, massive 85-inch behemoths, and curved ultra-wide monitors through meticulously engineered spacing grids measured precisely in millimeters.
Decoding VESA Dimensions: What Do the Numbers Actually Mean?
When shopping for a television wall mount, shoppers frequently encounter alphanumeric codes or matrix measurements such as VESA 200 × 200, VESA 400 × 400, or VESA 600 × 400. Deciphering these numbers is straightforward once you understand the underlying geometry.
If you inspect the reverse side of any modern, mountable flat-screen display, you will find four threaded metal screw holes arranged in a rectangular or square configuration. The VESA size describes the exact physical distance between these mounting holes, measured strictly in millimeters.
The Horizontal-by-Vertical Rule
The standard convention for expressing VESA dimensions always lists the horizontal distance first, followed by the vertical distance second.
- VESA 200 × 200: This indicates that the distance from the center of the left mounting holes to the center of the right mounting holes is 200 millimeters, and the distance from the top holes to the bottom holes is also 200 millimeters. This forms a perfect square grid.
- VESA 400 × 200: This indicates a rectangular grid where the horizontal distance between the holes is 400 millimeters, while the vertical distance is 200 millimeters.
- VESA 600 × 400: Typically found on larger, heavier displays (ranging from 65 inches to 85 inches and above), this pattern measures 600mm horizontally and 400mm vertically.
Dispelling Common Misconceptions
It is a common pitfall for buyers to confuse VESA dimensions with display screen sizes or resolution metrics.
- Screen Size Is Not VESA: While it is true that larger televisions generally require larger VESA mounting patterns to distribute weight evenly across a wider chassis, screen size alone is an unreliable indicator. Two different 55-inch television models manufactured by different brands—or even different generations of the same brand—frequently utilize entirely different VESA patterns (e.g., one might be 300 × 300 while another is 400 × 400).
- Universal vs. Single-Size Brackets: Consumers often worry that they must find a wall mount that matches their exact VESA dimension down to the millimeter in a single rigid bracket. Fortunately, the vast majority of modern wall mounts are engineered with slotted rails, adjustable arms, or multi-pattern adapter plates. A single versatile mount will often support a wide range of VESA patterns—such as supporting everything from 200 × 200 up to 600 × 400. As long as your TV’s specific VESA pattern appears on the manufacturer’s compatibility list, the mount will fit the physical hole layout.
Supporting Context and Metrics: How to Find Your TV’s VESA Pattern
Before purchasing a wall mount or articulating arm, you must accurately determine your display’s VESA pattern. Relying on estimates or guesswork is an invitation for installation failure. Industry experts recommend utilizing one of two reliable methods to find this information.
Method 1: Consult Documentation and Manufacturer Specifications
The easiest, safest, and most precise method requires no physical measuring tools whatsoever.
- Locate your television’s exact model number, which is typically printed on a white or silver certification sticker on the back panel of the unit, or found within the software settings menu under "About TV" or "System Information."
- Navigate to the manufacturer’s official support website or consult the physical user manual.
- Look specifically for the "Wall Mount Specifications" or "VESA Compatibility" section. Manufacturers universally publish these dimensions in millimeters.
Method 2: Physical Measurement
If your documentation is lost and the model number is obscured, you can manually measure the mounting configuration. Always use a metric tape measure or ruler.
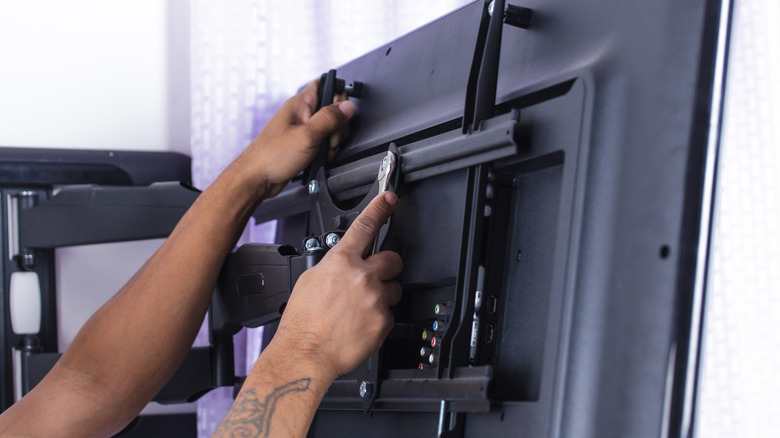
- Locate the Holes: Identify the four threaded metal screw receptacles recessed into the rear casing of the television.
- Measure Horizontally: Place the zero mark of your tape measure precisely at the center of the top-left mounting hole. Extend the tape horizontally across to the center of the top-right mounting hole. Record this measurement in millimeters. (Note: 1 inch equals roughly 25.4 millimeters, but direct metric measurement is strongly preferred to avoid conversion errors).
- Measure Vertically: Next, measure from the center of the top-left mounting hole straight down to the center of the bottom-left mounting hole. Record this measurement in millimeters.
- Format the Output: Combine your findings in the standard format: Horizontal Measurement × Vertical Measurement (e.g., 400 × 200 mm).
A Matching VESA Pattern Isn’t Enough: Critical Safety Factors
One of the most dangerous misconceptions in DIY home improvement is the belief that if a wall mount matches your TV’s VESA pattern, the installation is completely safe. A matching VESA pattern guarantees only one thing: the physical brackets will align with the screw holes on the back of your television.
It provides zero assurance regarding structural safety, load-bearing capacity, or wall integrity. To ensure a secure installation, you must evaluate several additional parameters.
+-----------------------------------------------------------------+
                 THE 3-PILLAR MOUNTING CHECKLIST
+-----------------------------------------------------------------+
  1. VESA Pattern Alignment  --> Do the holes match the bracket?
  2. Weight Capacity Limit   --> Is the mount rated for the TV?
  3. Wall & Hardware Integrity --> Can the wall support the load?
+-----------------------------------------------------------------+
1. Weight Capacity and Load Limits
Every wall mount is engineered with a strict maximum weight threshold. Even if a lightweight, budget-friendly bracket supports a massive VESA 600 × 400 pattern, attaching a heavy, premium OLED or older LED television that exceeds the mount’s weight limit can cause catastrophic failure.
- Weigh the TV: Always check the net weight of your television (excluding or including the stand, depending on whether you are removing it). Modern TVs are generally lighter than older models, but large-screen displays still exert significant downward torque—especially when mounted on articulating, full-motion arms that extend outward into the room.
- Exceed the Rating: It is best practice to select a mount whose maximum weight capacity significantly exceeds the actual weight of your television. Building in a safety buffer accounts for dynamic loads, such as adjusting the swivel, tilting the screen, or accidental downward pressure.
2. Hardware and Fastener Compatibility
The hardware that comes bundled with televisions and wall mounts can be a frequent source of frustration.
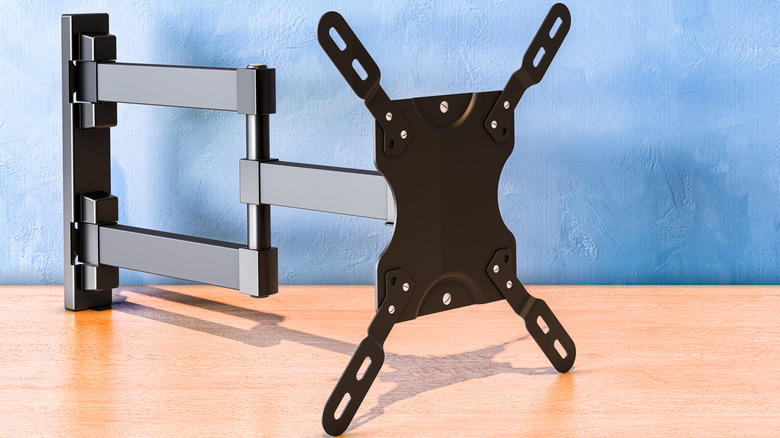
- Screw Length and Thread Pitch: Televisions feature threaded inserts of varying depths and diameters (commonly M4, M6, or M8 screws). Using a screw that is too long can bottom out inside the display chassis, cracking the internal circuit boards or ruining the screen. Conversely, using a screw that is too short will strip the threads, leading to an insecure hold. Always utilize the plastic spacers and specialized washers included in your mount kit to achieve a snug, flush fit without over-tightening.
- Wall-Side Hardware: VESA compatibility says nothing about how the bracket attaches to your home infrastructure. Whether your walls consist of wood studs, metal studs, solid concrete, or brick, you must use appropriate structural fasteners (such as heavy-duty lag bolts for wood framing or toggle bolts/masonry anchors for concrete). Never anchor a heavy TV solely into standard drywall; wall anchors will pull free under tension, resulting in a dangerous collapse.
Future Outlook: Trends in Display Mounting and VESA Standards
As display technology continues to evolve at a rapid pace, the VESA standards committee is continuously adapting to meet the structural demands of next-generation hardware.
- Ultra-Thin and Zero-Gap Designs: Modern television engineering prioritizes ultra-slim profiles, with some flagship panels measuring mere millimeters in thickness. These razor-thin designs have driven the adoption of specialized "no-gap" or flush-mounting VESA systems that recess mounting hardware directly into the chassis rear, allowing the display to hang flat against the wall like a framed painting.
- Ergonomic and Motorized Mounts: In both corporate workspaces and smart homes, motorized VESA mounts integrated with voice assistants or automated home-automation ecosystems are rising in popularity. These mounts allow users to adjust screen height, tilt, and rotation via remote control, placing even greater demands on precise VESA calibration and heavy-duty motor torque limits.
- Standardization for Ultra-Wide and Gaming Monitors: With the explosion of curved ultra-wide desktop monitors for gaming and productivity, VESA has refined its standards to accommodate off-center gravity loads and curved chassis designs, ensuring that desktop monitor arms and wall brackets maintain stability under unique mechanical forces.
Summary Checklist for a Successful Installation
Before drilling your first hole, run through this final verification sequence:
- Identify Your VESA Pattern: Look up your TV’s exact model number or measure the hole spacing in millimeters (Horizontal × Vertical).
- Verify Mount Compatibility: Ensure the wall mount explicitly lists your VESA pattern among its supported configurations.
- Check Weight Ratings: Confirm that the mount’s maximum weight limit comfortably exceeds the net weight of your display.
- Inspect Wall Construction: Determine whether you are mounting into wood studs, concrete, or metal framing, and secure appropriate hardware.
- Test Fasteners: Use the correct screw length, thread pitch, and spacers provided to safeguard your television’s internal chassis.
By respecting the rigorous engineering behind the VESA standard and accounting for weight and wall dynamics, you can ensure a secure, professional-grade installation that protects your equipment and elevates your viewing experience for years to come.