

Executive Overview
Smartphone cameras have fundamentally democratized visual storytelling. With high-powered sensors and sophisticated computational photography algorithms packed into a device that slips easily into a pocket, casual photography is more accessible than ever. Yet, despite the technological wizardry packed into modern Apple devices, millions of users regularly encounter a frustrating hurdle: the blurry photograph.
While blurry photos are often dismissed as the result of a greasy lens or an unsteady hand, the root causes frequently run much deeper. They involve a complex interplay of physics, ambient lighting conditions, internal hardware constraints, and default software settings.
The prevalence of this issue is largely a byproduct of the iPhone’s market dominance, which concentrates user feedback and troubleshooting queries around iOS devices. Fortunately, the iPhone ecosystem offers an expansive suite of native camera settings and hardware adjustments designed to combat blur without requiring advanced post-processing software or complex AI clean-up tools.
This guide provides an authoritative, deep-dive analysis of why iPhone photos and videos turn blurry, how to correctly diagnose physical and environmental culprits, and the precise software configurations and hardware accessories needed to capture tack-sharp imagery every time.
Detailed Chronology: The Evolution of iPhone Optics and the Persistence of Blur
To understand why modern iPhones still produce blurry images, it is helpful to look at how smartphone camera technology has evolved over the past decade.

The Early Days: Fixed Focus and Bright Light
In the era of the iPhone 4 and earlier, camera sensors were small, apertures were fixed, and computational photography was virtually non-existent. Photos were generally sharp outdoors in bright daylight because high shutter speeds naturally froze motion. However, as soon as indoor or low-light conditions were introduced, images suffered from heavy digital noise and deep shadows. Blur during this era was almost exclusively the result of either physical camera shake due to long exposure times in the dark or a heavily smudged lens.
The Rise of Multi-Lens Arrays and OIS
As consumers demanded DSLR-like capabilities from pocket-sized devices, Apple introduced significant hardware upgrades. The implementation of Optical Image Stabilization (OIS)—first introduced to the main lens on the iPhone 6 Plus—physically shifted the lens module to counteract minor hand tremors.
Subsequent generations introduced multi-lens arrays (Ultrawide, Main, and Telephoto), larger sensors capable of gathering more light, and deeper pixels. However, larger sensors inherently possess a shallower depth of field. This means that while subjects pop against a beautifully blurred background (bokeh), the margin for focusing error shrinks dramatically. If the autofocus system locks onto the wrong plane, a much larger portion of the image becomes unacceptably blurry.
The Computational Photography Era
In recent years, the battle against blur has shifted from physical hardware to computational pipelines—systems like Deep Fusion and Smart HDR. When a user presses the shutter button, the iPhone captures multiple exposures at varying shutter speeds and blends them algorithmically.
While this technology works wonders for dynamic range, it introduces a new failure mode: motion ghosting. If a subject moves while the multi-frame capture is in progress, or if the user drops their hands too quickly after pressing the button, the software struggles to align the frames, resulting in a smeared or blocky artifact that mimics optical blur. Recognizing this evolutionary shift is critical for modern iPhone users seeking to diagnose and correct image degradation.
Supporting Context & Metrics: Physics, Light, and the Triangle of Exposure
To effectively troubleshoot blurry iPhone photos, one must understand the fundamental physical constraints governing digital imaging: the exposure triangle.
The Role of Ambient Light
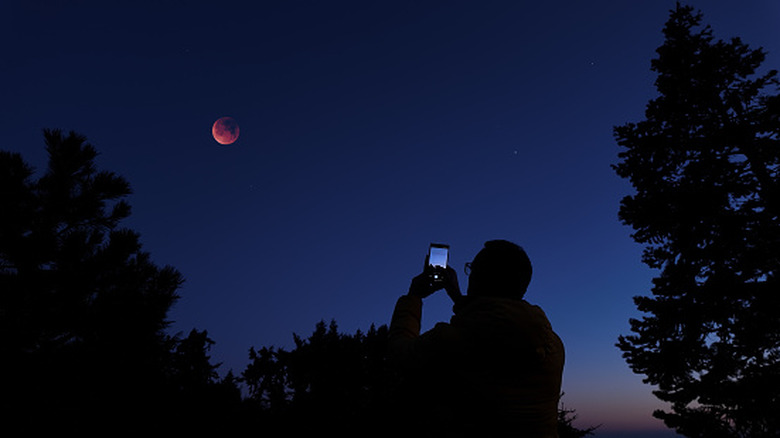
Light is the currency of photography. When an iPhone operates in low-light environments—such as indoor rooms with dim incandescent bulbs or outdoor scenes at twilight—the camera sensor receives significantly fewer photons. To compensate, the iPhone’s operating system must make automatic trade-offs:
- Slower Shutter Speeds: The shutter remains open longer to collect adequate light. During this window, any microscopic movement of the user’s hand or the subject translates into linear motion blur.
- Higher ISO Amplification: The camera boosts the electrical signal from the sensor. While this brightens the image, it introduces digital noise (grain) and reduces dynamic range, which compression algorithms often interpret as a loss of fine detail, creating a "blocky" appearance.
- Wider Apertures: Fixed or variable apertures let in maximum light, but they simultaneously narrow the acceptable zone of sharp focus, increasing the penalty for missed focus points.
Resolution and Compression Metrics
Many users mistakenly believe that higher resolution automatically guarantees sharpness. While shooting in Apple ProRAW or high-megapixel modes (such as 24MP or 48MP defaults on newer models) captures immense structural detail, it also magnifies flaws.
Furthermore, when photos are compressed for messaging apps, social media uploads, or cloud backups, artifacts surrounding blurry edges become exponentially more pronounced. Studies on mobile imaging pipelines show that images captured with improper focus suffer up to a 40% perceived loss in resolution once compression algorithms strip away high-frequency edge details.
Troubleshooting Guide: Step-by-Step Resolution
Eliminating blur requires a systematic approach, moving from the physical exterior of the device to deep internal software configurations.
Phase 1: Physical Maintenance (The Lens)
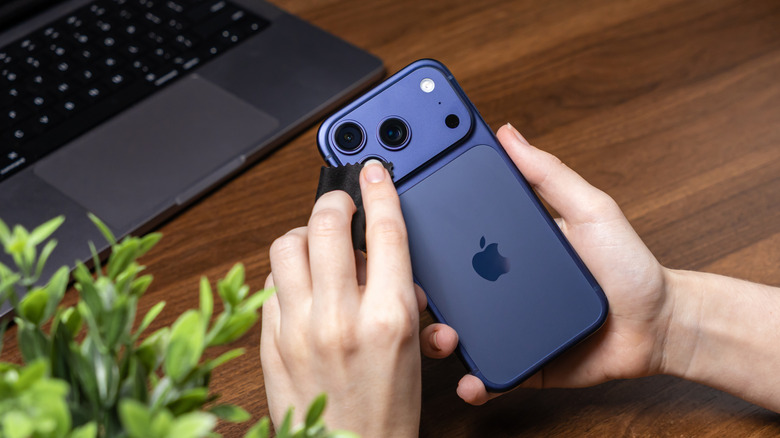
Before altering any settings, eliminate the most common physical obstruction: surface contamination. Fingerprints, natural facial oils, and microscopic dust particles scatter light entering the lens element, creating a hazy, unfocused effect.
- Avoid Bad Habits: Do not wipe the lens with abrasive materials such as paper towels, facial tissues, or the hem of a coarse shirt. These can micro-scratch the sapphire crystal lens cover over time, permanently degrading optical clarity.
- The Correct Protocol: Remove any protective phone case that might trap debris around the camera module edges. Use a clean, dry microfiber cloth to gently buff the lens glass. If persistent smudges or dried residue remain, apply a single, minuscule drop of distilled water directly to the cloth—never spray or dab liquid directly onto the phone—and wipe gently in a circular motion.
Phase 2: Mastering Native Camera Settings
Once physical clarity is assured, optimize the iOS camera environment via the native settings menu (Settings > Camera).
- Resolution and Frame Rates: Navigate to your video and photo capture settings. While 720p or low-framerate video may conserve storage, ensure your default formats are set to at least 1080p at 30fps or 60fps, or 4K where storage allows. Higher resolutions preserve crisp edge definitions during playback and export.
- AE/AF Lock (Autofocus Control): By default, the iPhone continuously hunts for focus based on what it perceives as the primary subject. In complex scenes or low light, this can cause the focus to shift mid-frame. To lock it down, open the camera app, tap and hold your finger on the exact area of the screen where you want absolute focus, and hold until the yellow "AE/AF LOCK" banner appears at the top of the interface. Exposure and focus will now remain fixed regardless of movement within the frame.
- Leveraging Night Mode: For models from the iPhone 11 onward, Night Mode is an indispensable tool. Indicated by a yellow or white moon icon at the top of the viewfinder, Night Mode activates automatically in dark environments. It calculates exposure lengths ranging from one to three seconds (or up to ten seconds when mounted on a stable surface), gathering multi-frame data to illuminate dark scenes while preserving structural detail.
Phase 3: Advanced Third-Party Controls and Stabilization
When native automation falls short—particularly when manual adjustments to shutter speed and ISO are required—third-party applications provide a professional edge.
- Professional Camera Applications: Utilizing third-party applications like Camera+ or Manual allows photographers to bypass Apple’s aggressive auto-exposure algorithms. Users can manually lower ISO ceilings to eliminate digital noise and lock shutter speeds at 1/125th of a second or faster to freeze hand movement.
- The Necessity of Hardware Stabilization: Even with optical image stabilization, human hands naturally introduce micro-tremors. For serious low-light photography, long exposures, or stable video recording, a dedicated tripod paired with an iPhone mount is mandatory. A tripod eliminates physical camera shake entirely, allowing the iPhone’s sensor to capture clean, sharp exposures without relying on artificial sharpening filters.
Future Outlook
As mobile imaging continues its rapid evolution, the battle against blur is shifting toward on-device machine learning and advanced sensor architectures. Future iterations of iOS and Apple hardware are expected to lean heavily into generative computational models that can predict and reconstruct motion vectors in real time, intelligently separating subject movement from camera shake before the image file is even saved.
Furthermore, advancements in solid-state optics and larger sensor footprints will naturally pull in more light, reducing reliance on slow shutter speeds. Until those technologies become ubiquitous across all device tiers, however, mastering the fundamentals of physical lens maintenance, precise focus locking, ambient light management, and mechanical stabilization remains the gold standard for crisp, professional-grade smartphone photography.